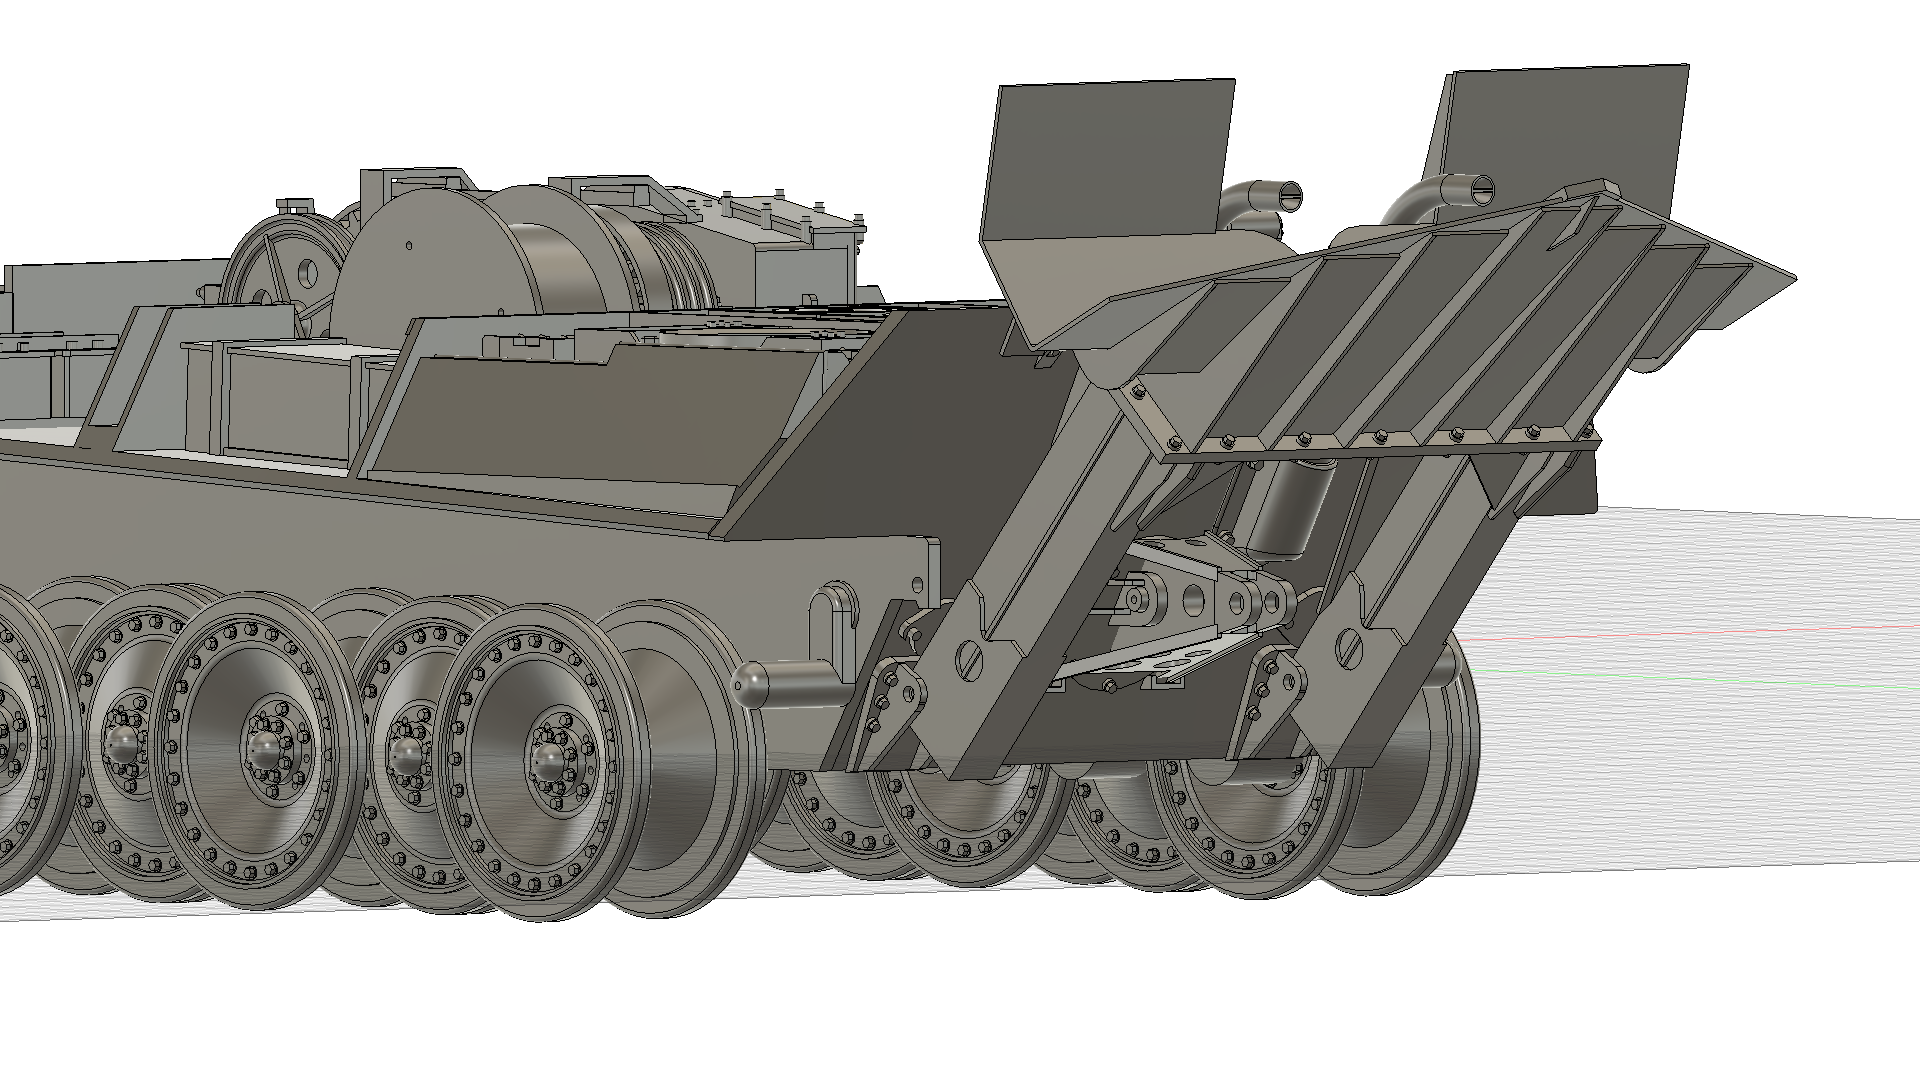
- 1/72 ベルゲパンター フルインテリアキット(3Dプリンタ)の作り方 How to assemble 1/72 Bergepanther Full Interior Kit
- 3Dプリンタキットの基礎について
- パーツ構成 Parts composition
- 組立(Painting and assembly)
- 車体の組立て Assembling the Body
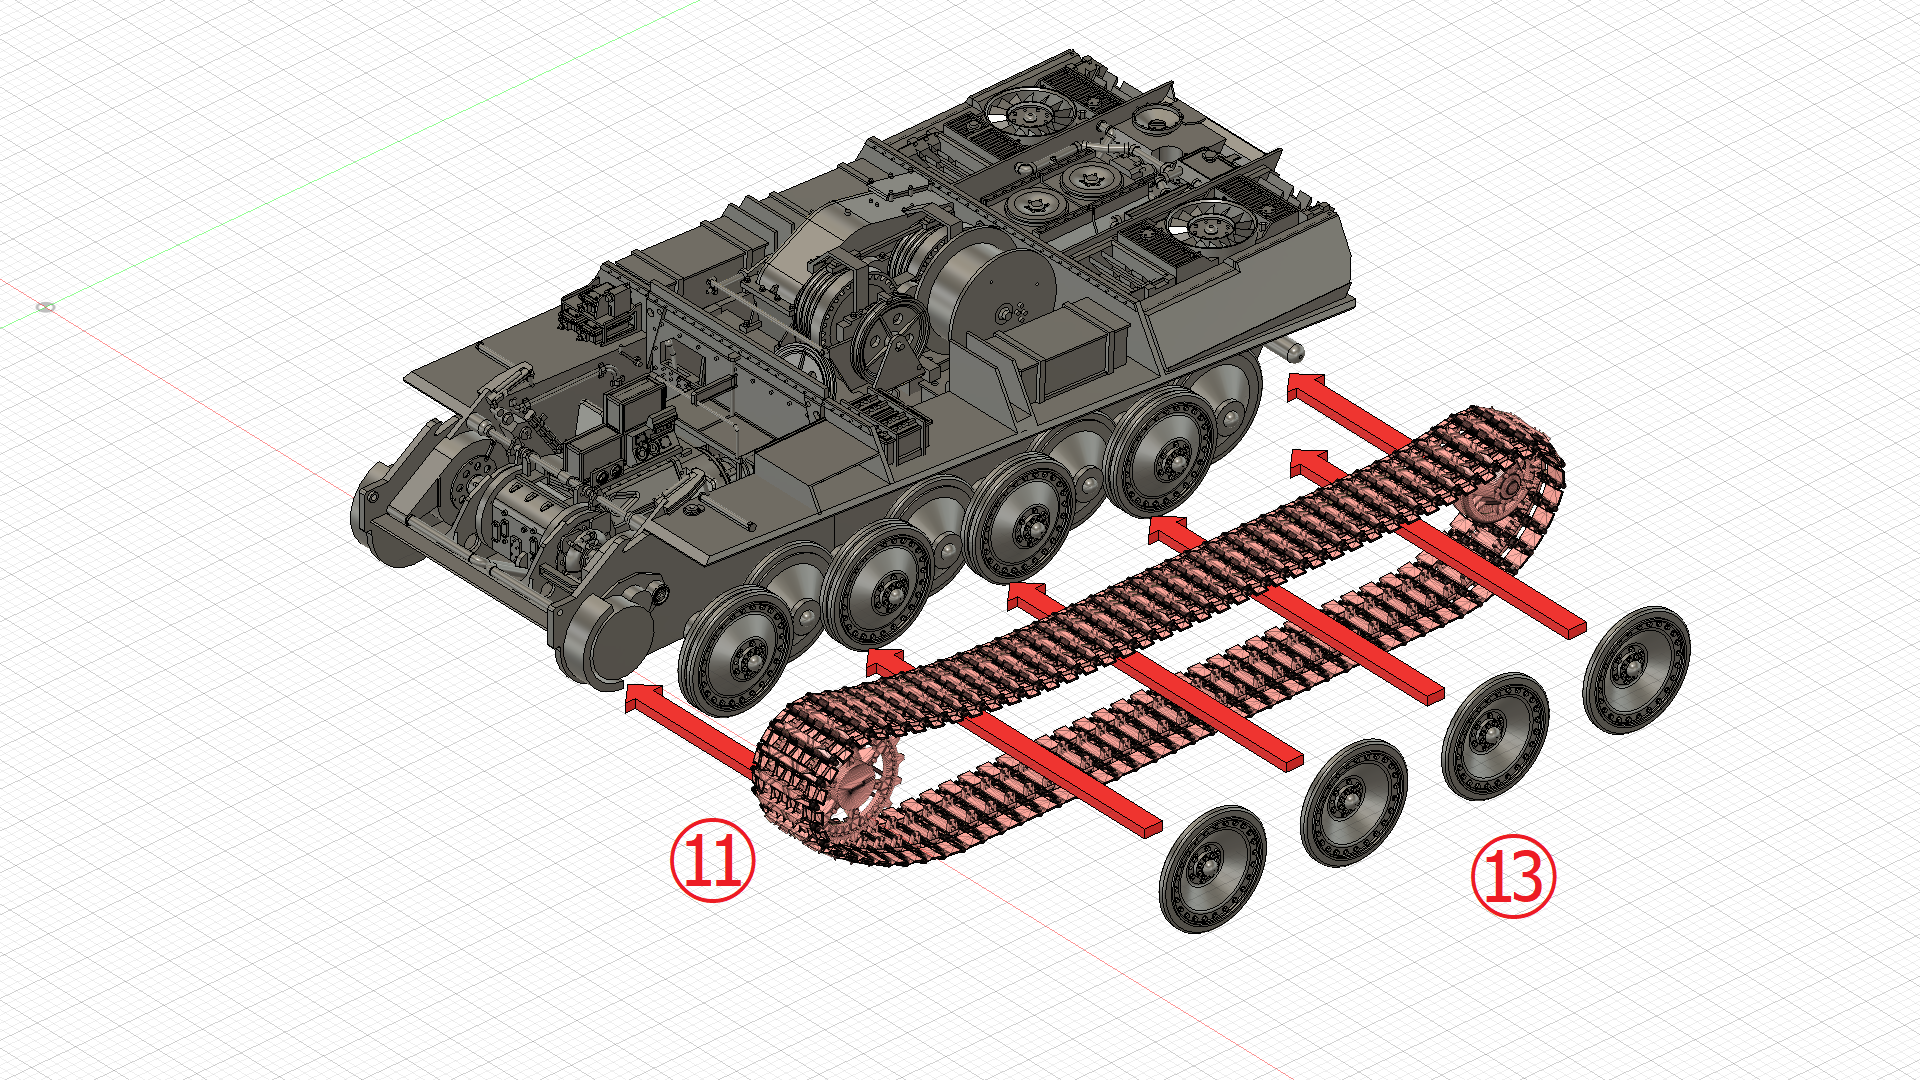
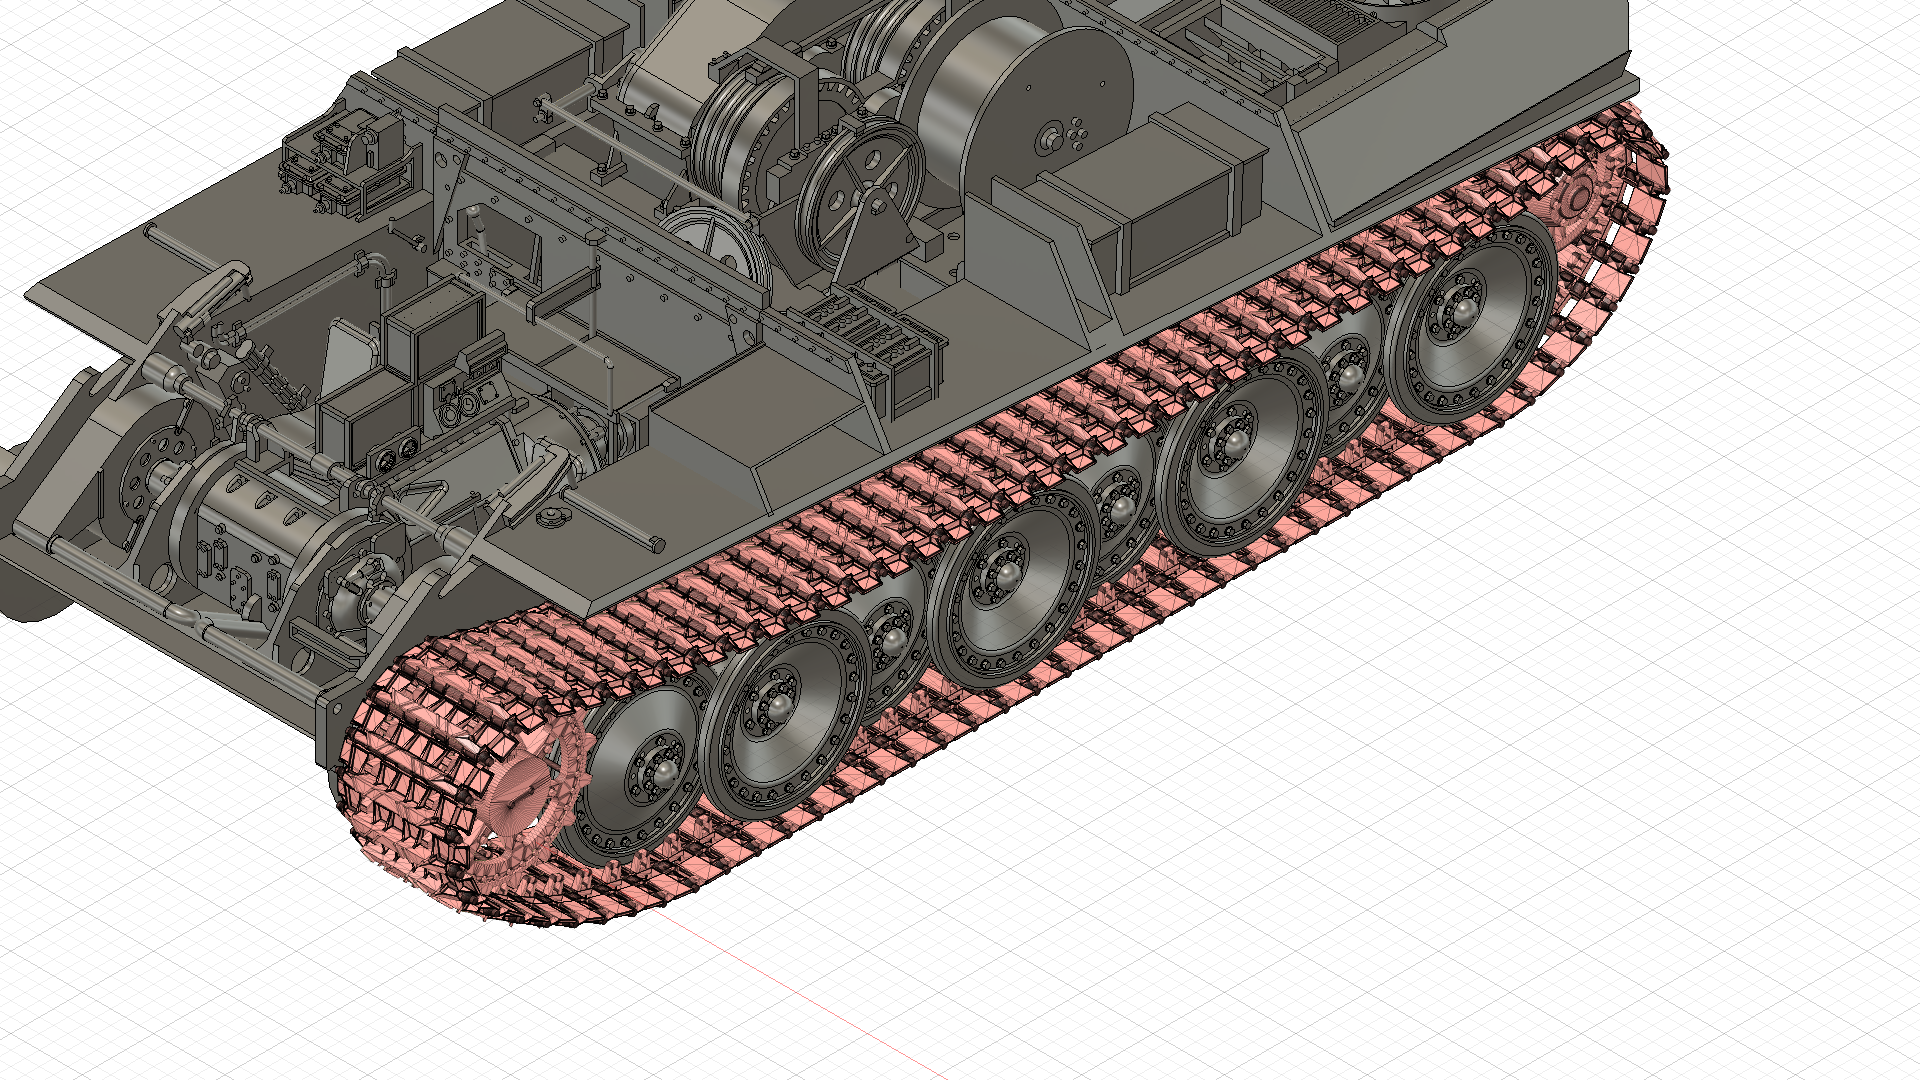
- 履帯・転輪の組立て Assembling the Tracks and wheels
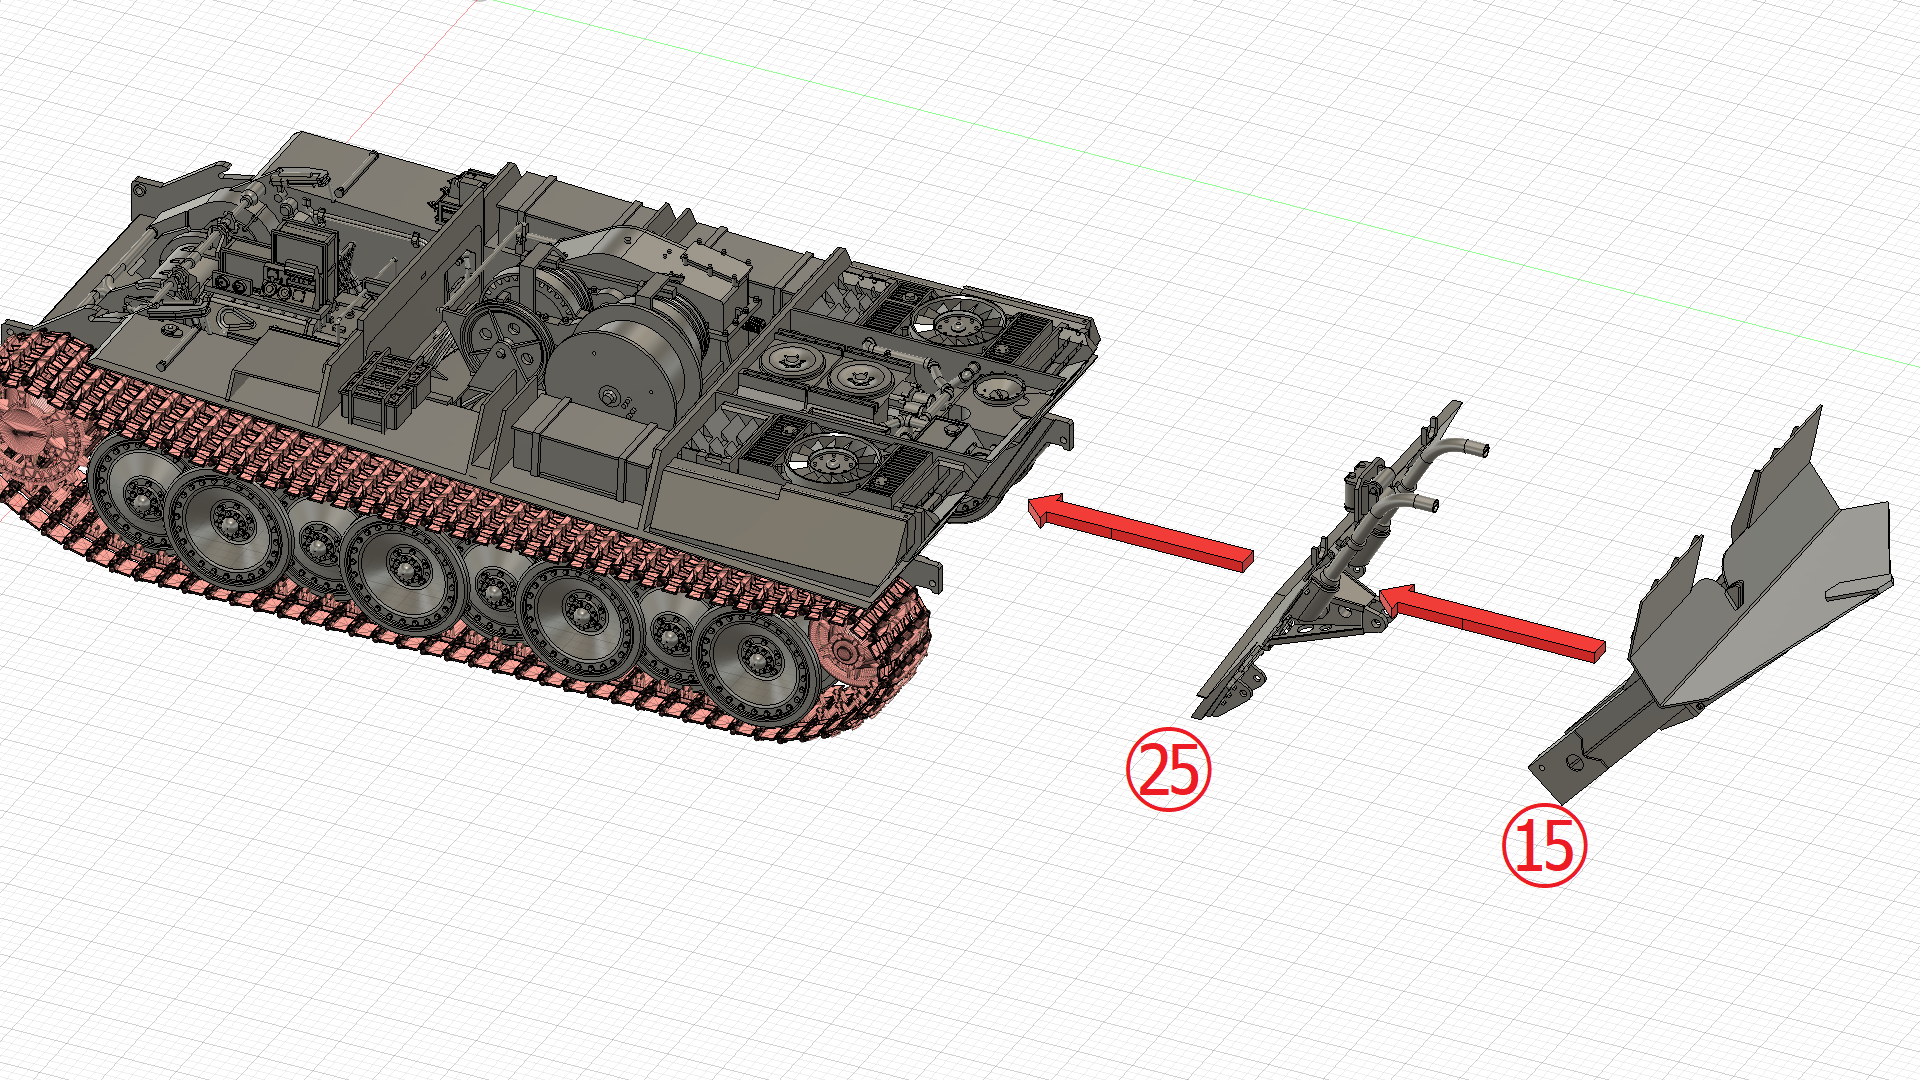
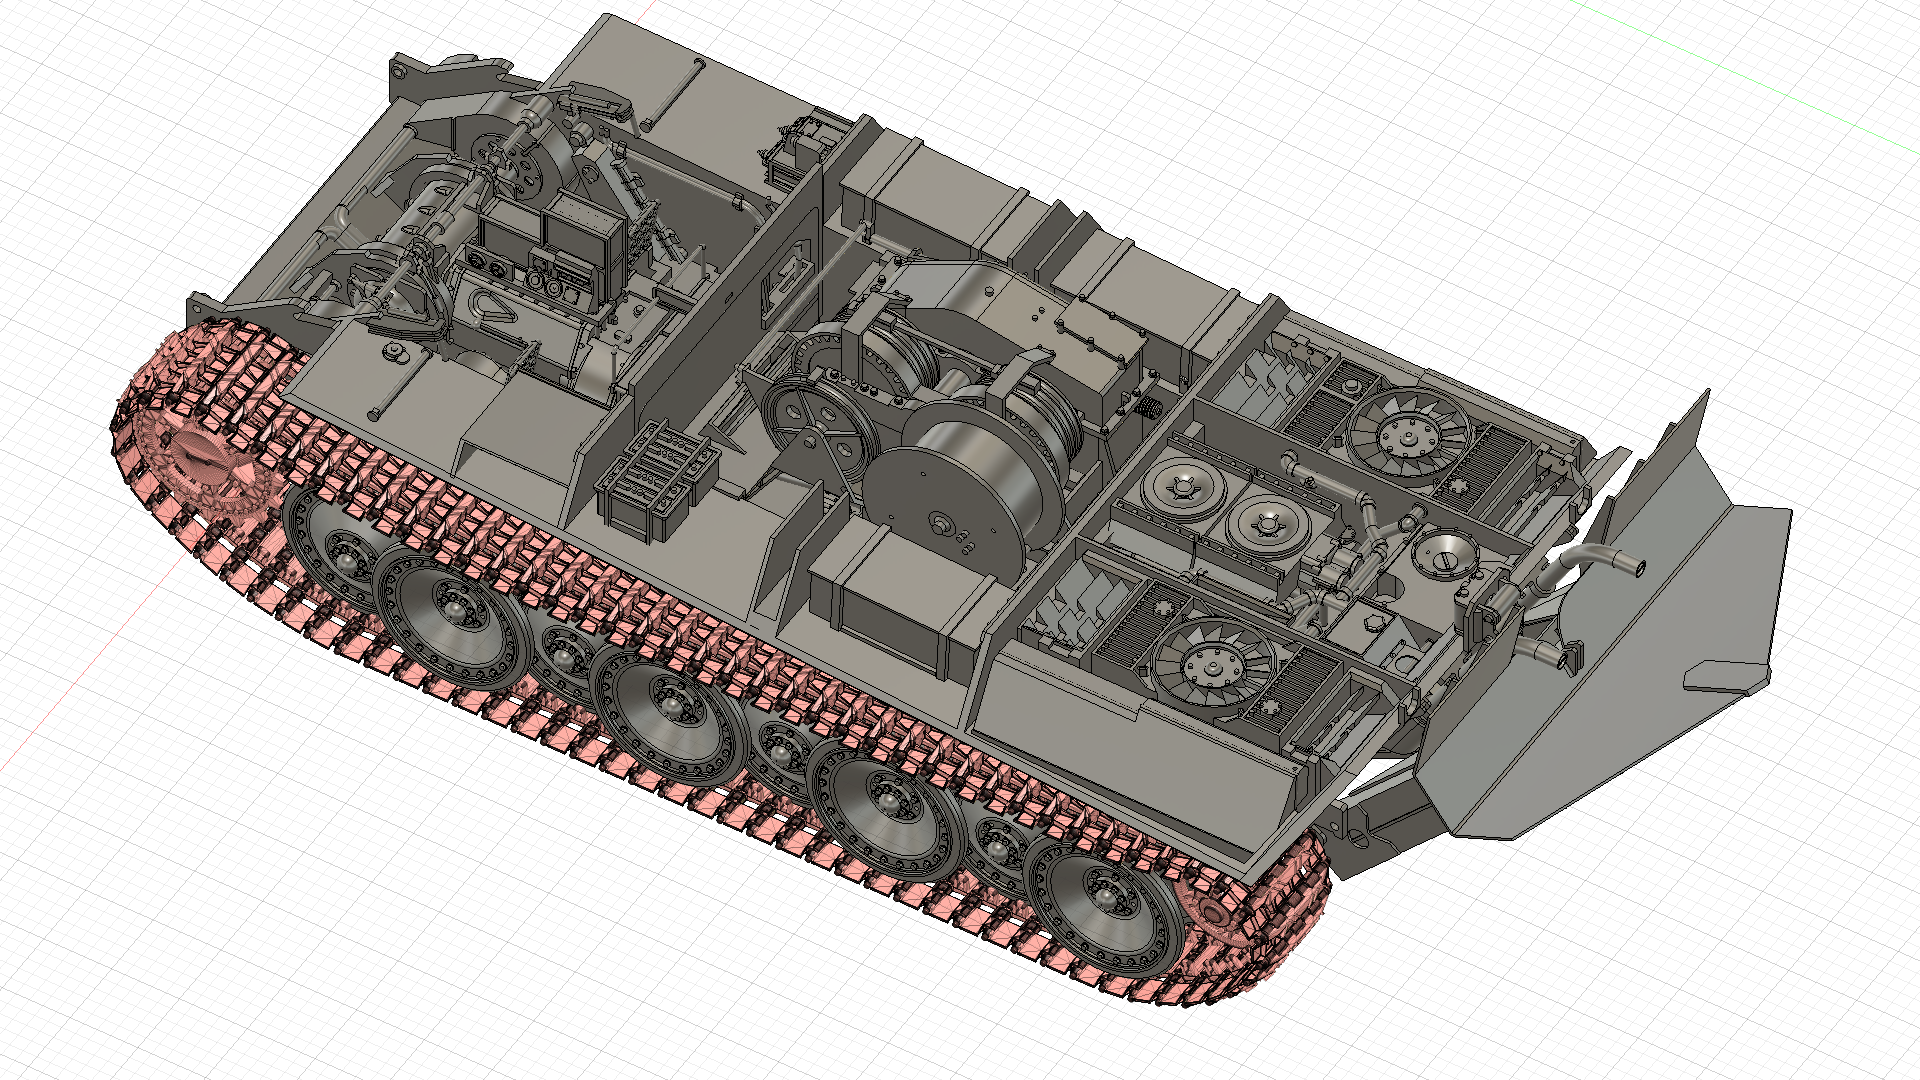
- 後部パネルの組立て Assembling the Rear panel
- ウィンチハウジングの組立て1 Assembling the winch housing 1
- ウィンチハウジングの組立て2 Assembling the winch housing 2
- 車体装甲の組立て Assembling the Armor
- 車体と車体装甲の組立て Coupling of the body and armor
- 牽引バーの組立て Assembling the Towing bar
- 予備履帯の組立て Assembling the Spare tracks
- 組立のポイント Precautions for assembly
- 最後に
- 販売サイト
1/72 ベルゲパンター フルインテリアキット(3Dプリンタ)の作り方 How to assemble 1/72 Bergepanther Full Interior Kit
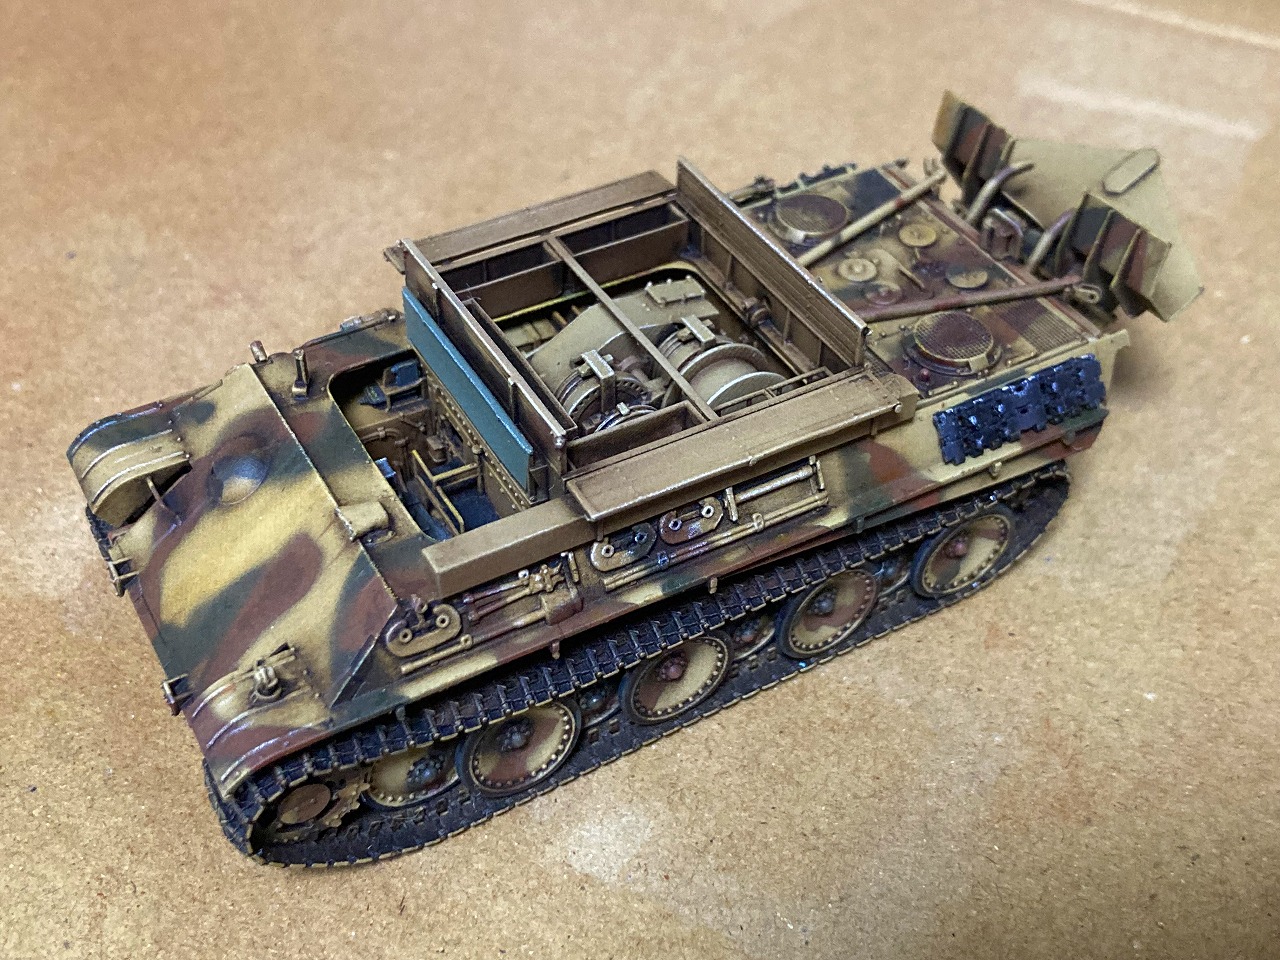
本ページは、自作野郎工房の開発した3Dプリンタキット「1/72 ベルゲパンター フルインテリアキット(3Dプリンタ)」について概要をまとめたものです。
3Dプリンタキットは市販のプラスチックモデルと異なり、取り扱いに特徴があります。
本キットを完成させるために必要なポイントについて解説致します。結論から申し上げますと、3Dプリンタキットの経験がない方もこのページを参照して頂ければ問題なく本キットを完成させることができます。ぜひ、チャレンジしてみてください。
This page is a summary of the 3D printer kit "1/72 Bergepanter Full Interior Kit (3D Printer)" developed by the self-made bastard studio.
Unlike commercially available plastic models, 3D printer kits are unique in their handling.
This page is a summary of the 3D printer kit "1/72 Bergepanther full interior kit (3D printer)" developed by the self-made bastard studio.
販売サイト Sales site
ヤフーオークション Yahoo auction
Amamzon Japan
eBay
製品概要 Product Summary
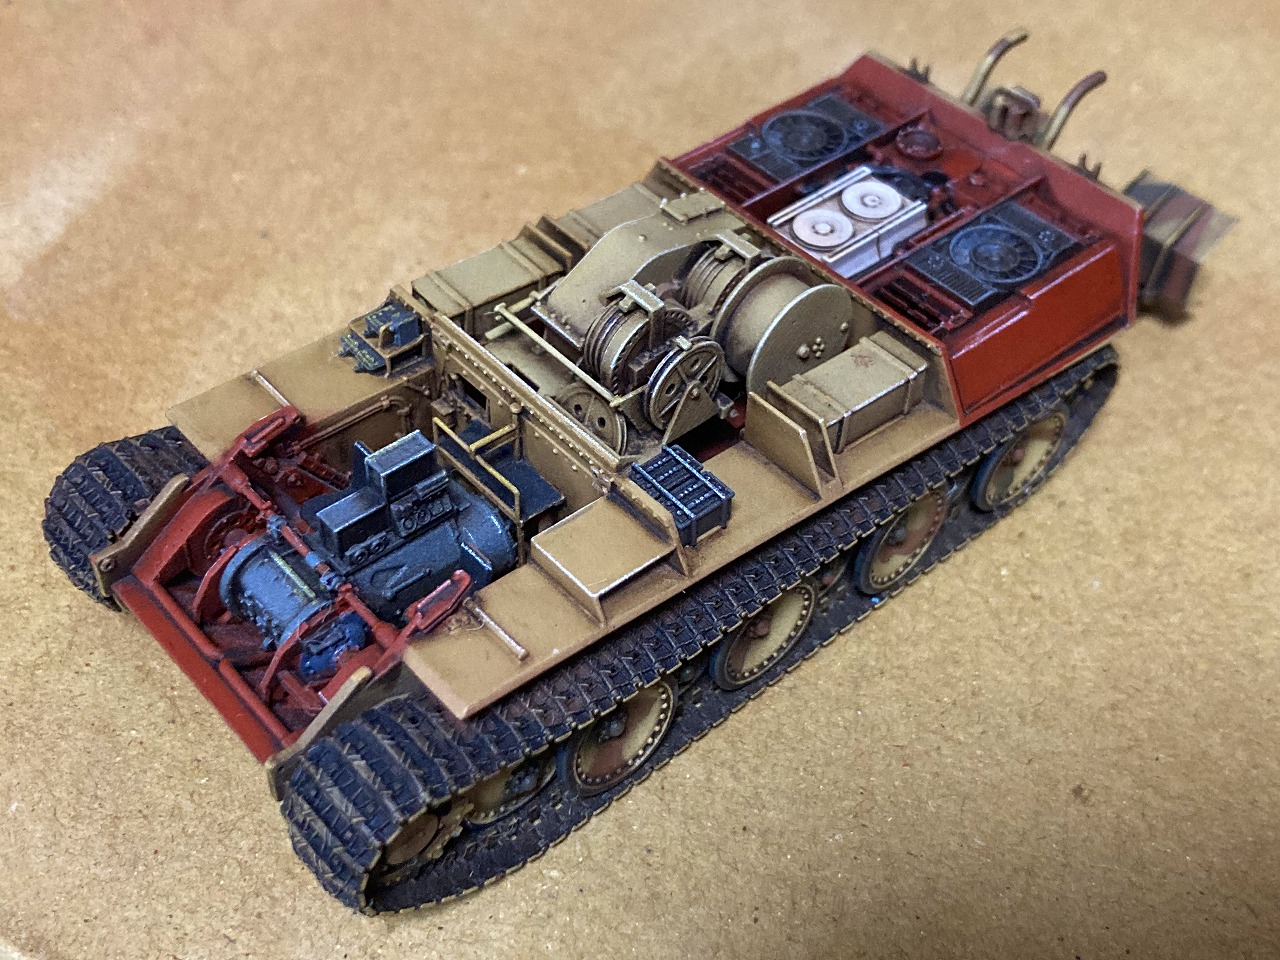
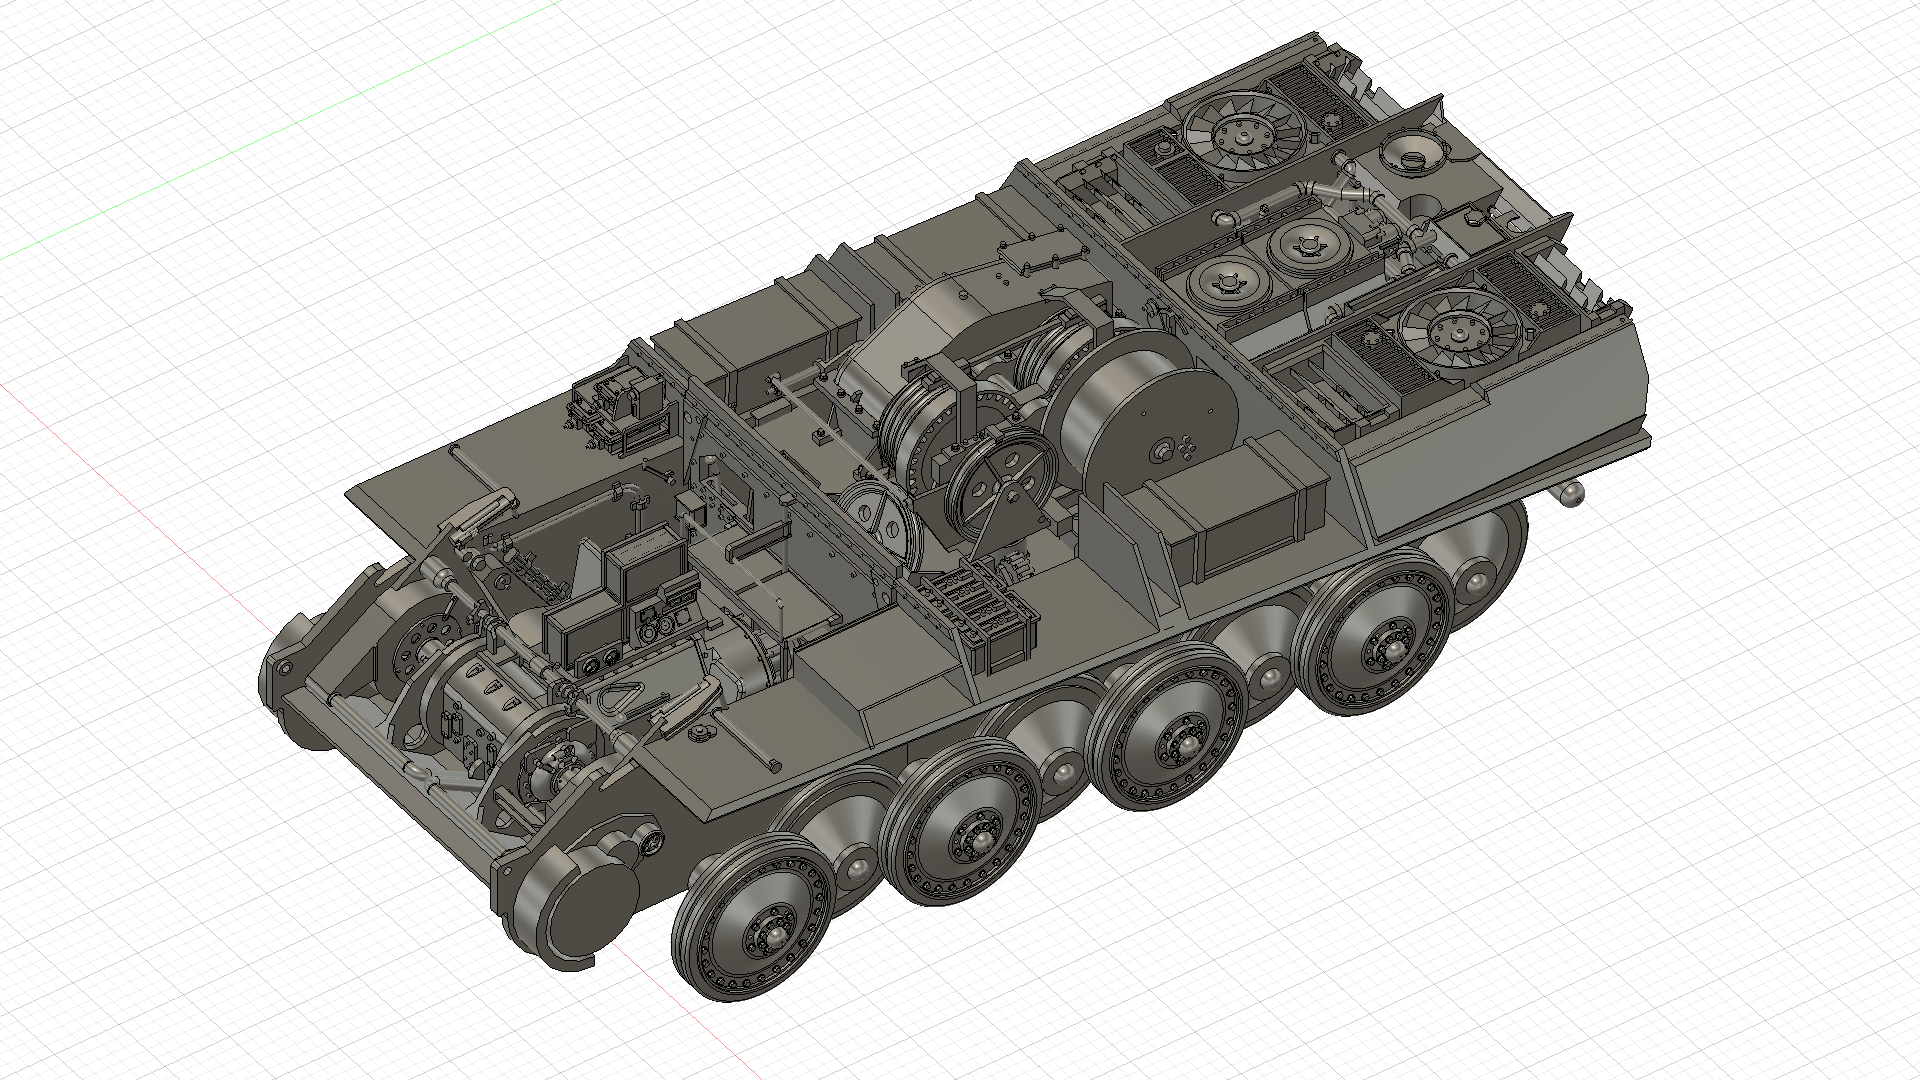
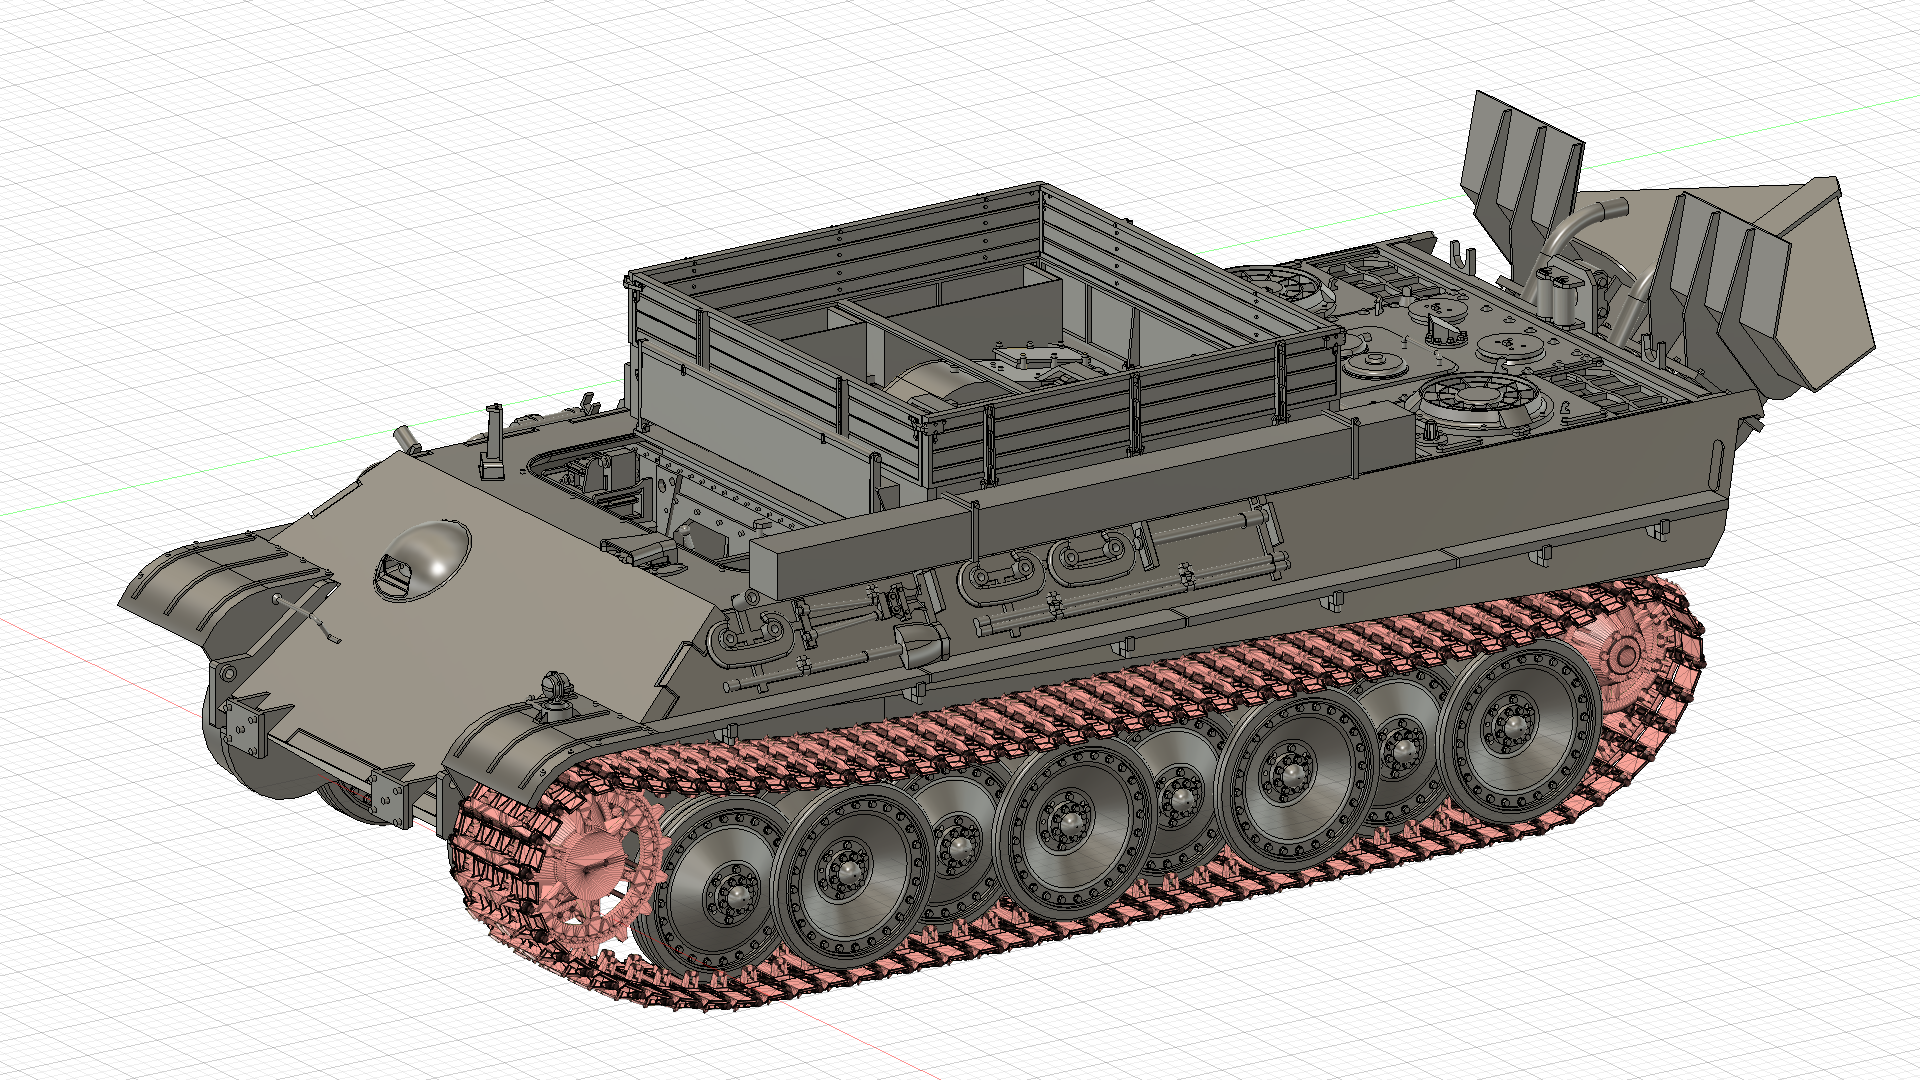
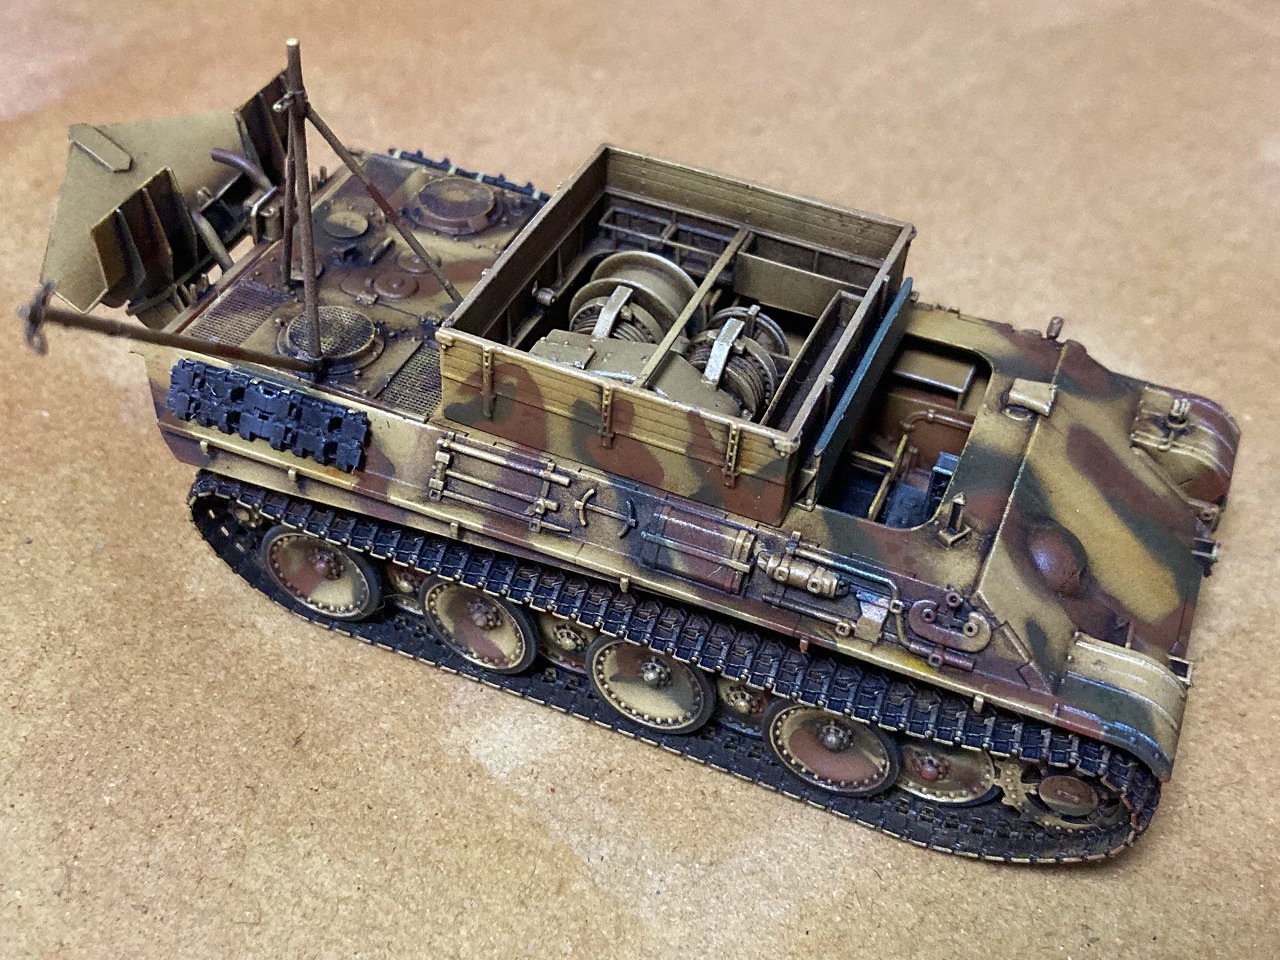
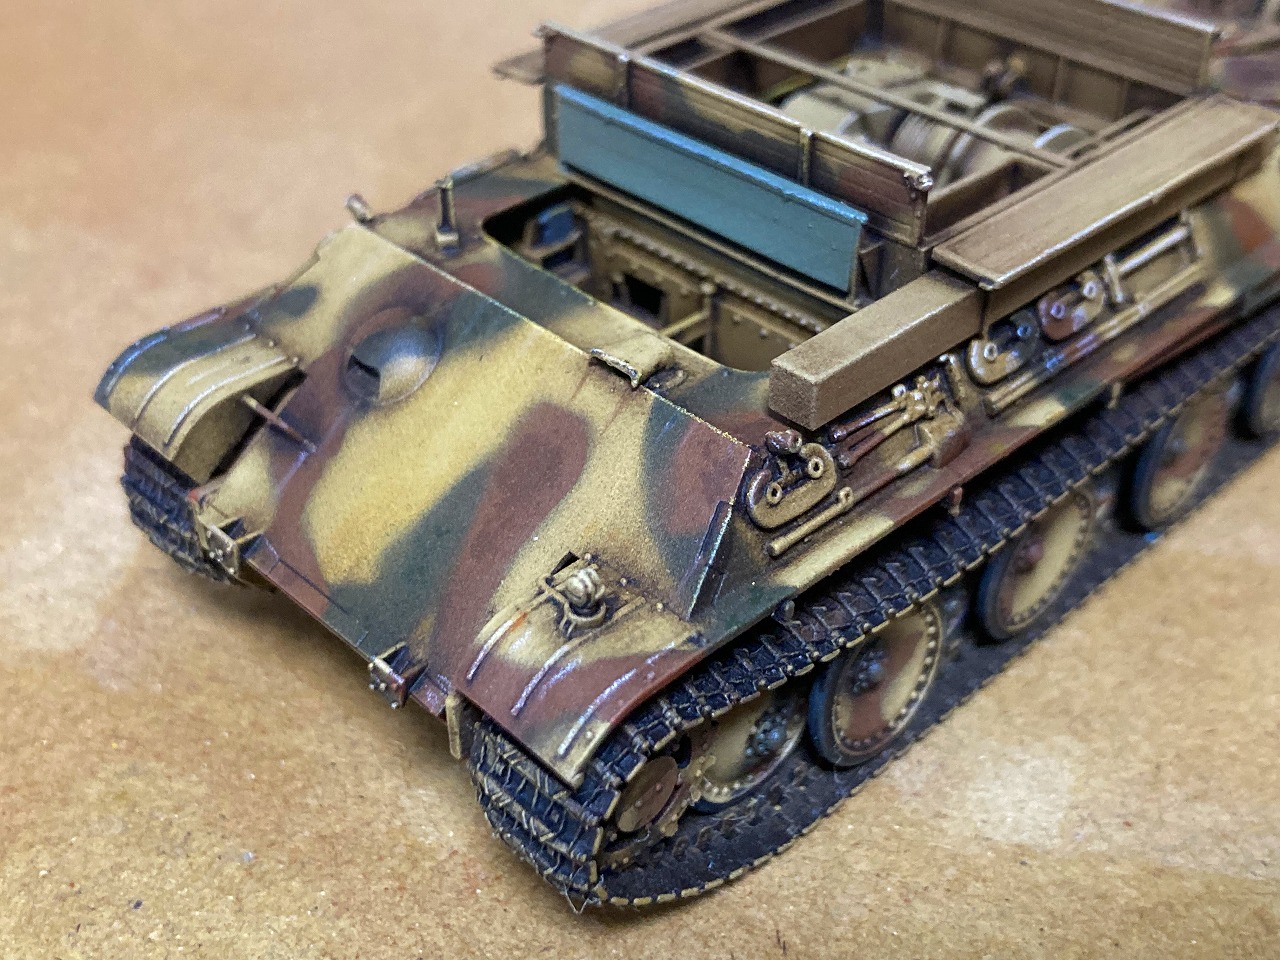
- 1/72スケールのWW2ドイツ軍特殊車両 ベルゲパンターのフルインテリアキットです。
- 本キットはフルキットです。他社製のベースキットは不要です。
- エンジンルーム、トランスミッション、ウィンチ、各種メータパネル、無線機などがリアルに再現されています。
- 塗装の容易さ、リアルさを追求するためパーツ分割がなされています。
- 本キットは上級者向けです。3Dプリンタキットをすでに作成した経験がある方を対象としています。できる限り、弊社の他製品で3Dプリンタキットに慣れて頂いてから、本キットをご購入されることをお勧めいたします。
- 1/72 scale WW2 German special vehicle Berge Panther full interior kit.
- This kit is a full kit. No third-party base kit is required.
- The engine room, transmission, winch, various meter panels, radios, etc. are realistically reproduced.
- Parts are divided to pursue ease of painting and realism.
- This kit is for advanced users. For those who have already created a 3D printer kit. As much as possible, we recommend that you familiarize yourself with the 3D printer kit with other products of our company before purchasing this kit.
特徴 Features
- 3Dプリンタ初心者の方のために、練習用として小さな部品、壊れやすい部品は計2セット同梱しています(練習用のパーツはサポートが割れている等のB級品が梱包されている場合があります)。
- 底面には3Dプリンタ特有のサポートが多数あるため丁寧な作業が必要です。また、レジンは一般のプラモデルの素材と比較し欠けやすいため、サポートの除去は薄刃ニッパー等で丁寧な除去が必要となります。
- モノクロ4Kの高解像度3Dプリンタに、有名メーカーの水洗いレジンを使用して出力しています。
- 丁寧に専用機材を使用しきちんと2次硬化を行っています。3Dプリンタ製品にありがちなべたつき等はありません。
- For beginners of 3D printers, a total of 2 sets of small parts and fragile parts for practice are included (Practice parts are packed with B-class products such as broken supports. There may be).
- There are many 3D printer-specific supports on the bottom, so careful work is required. In addition, since resin is more easily chipped than general plastic model materials, it is necessary to carefully remove the support with a thin blade nipper or the like.
- A monochrome 4K high-resolution 3D printer is output using a water-washing resin from a well-known manufacturer.
- We carefully use special equipment to perform secondary curing properly. There is no stickiness that is typical of 3D printer products.
注意事項 important points
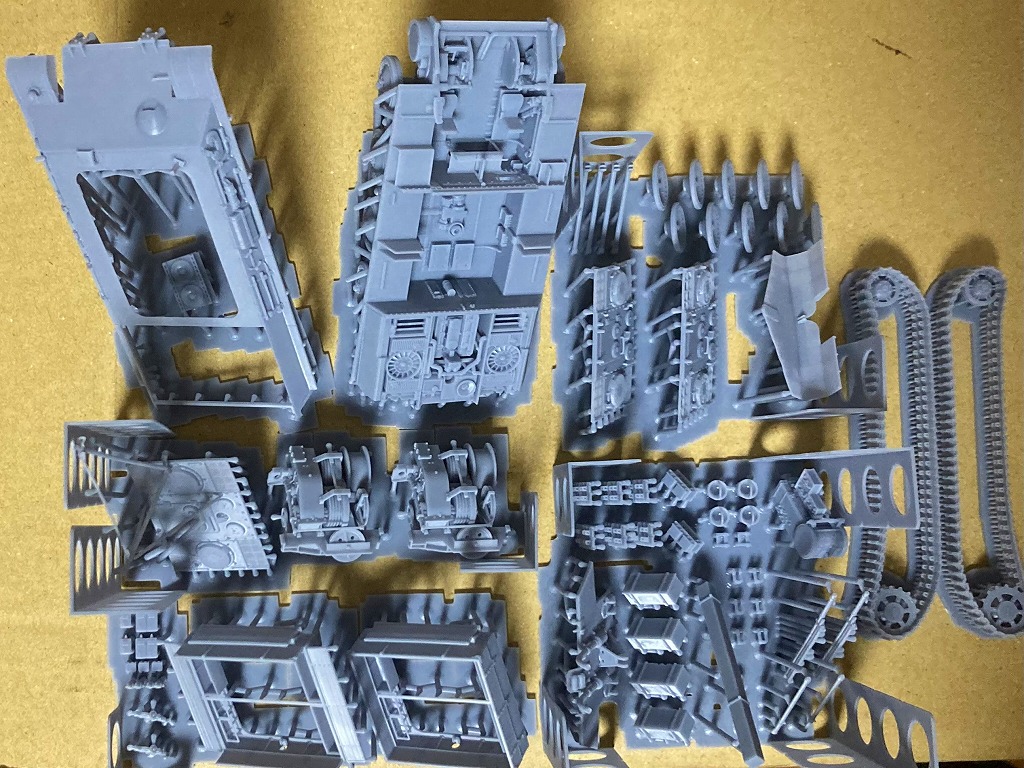
- このキットに含まれるのは以下の写真にあるパーツです。
- 本キットは3Dプリンタキットであるため、3Dプリンタによる出力で避けられない細かな段差・ゆがみがある程度発生します。その状態は商品写真でご確認ください。
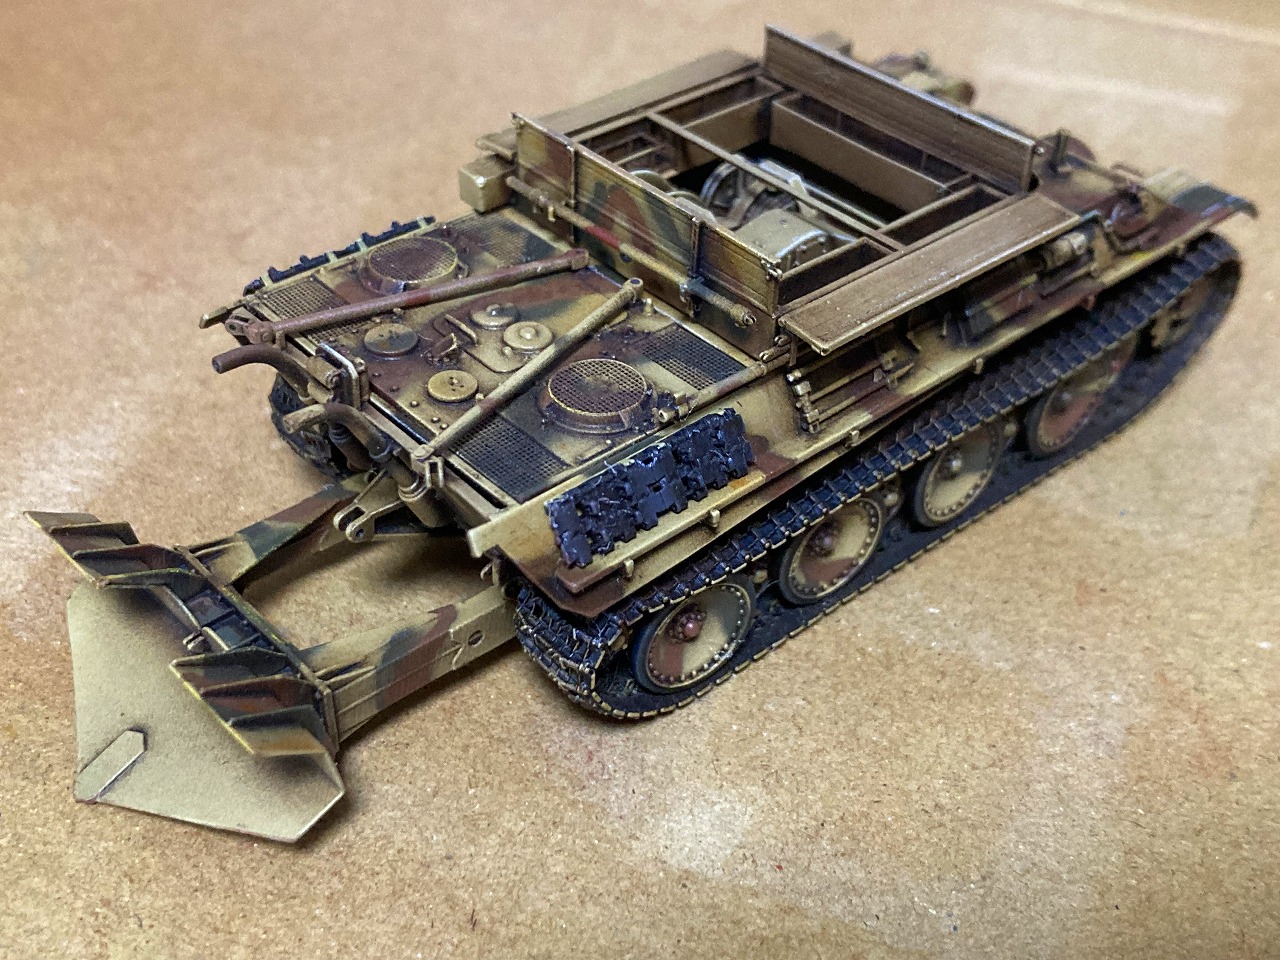
- 塗装されているものは作例です。
3Dプリンタキットの基礎について
3Dプリンタキットは市販のプラスチックモデルと異なる素材・製法で作成されています。
3Dプリンタキットの特徴や注意事項は以下にまとめてありますので、そちらをご覧ください。
The 3D printer kit is made with a different material and manufacturing method from the commercially available plastic model.
Please refer to the following for the features and precautions of the 3D printer kit.
ポイント1 3Dプリンタキットについて Point 1 About 3D printer kit
ポイント2 パーツの切り出し Point 2 How to cut out parts
パーツ構成 Parts composition
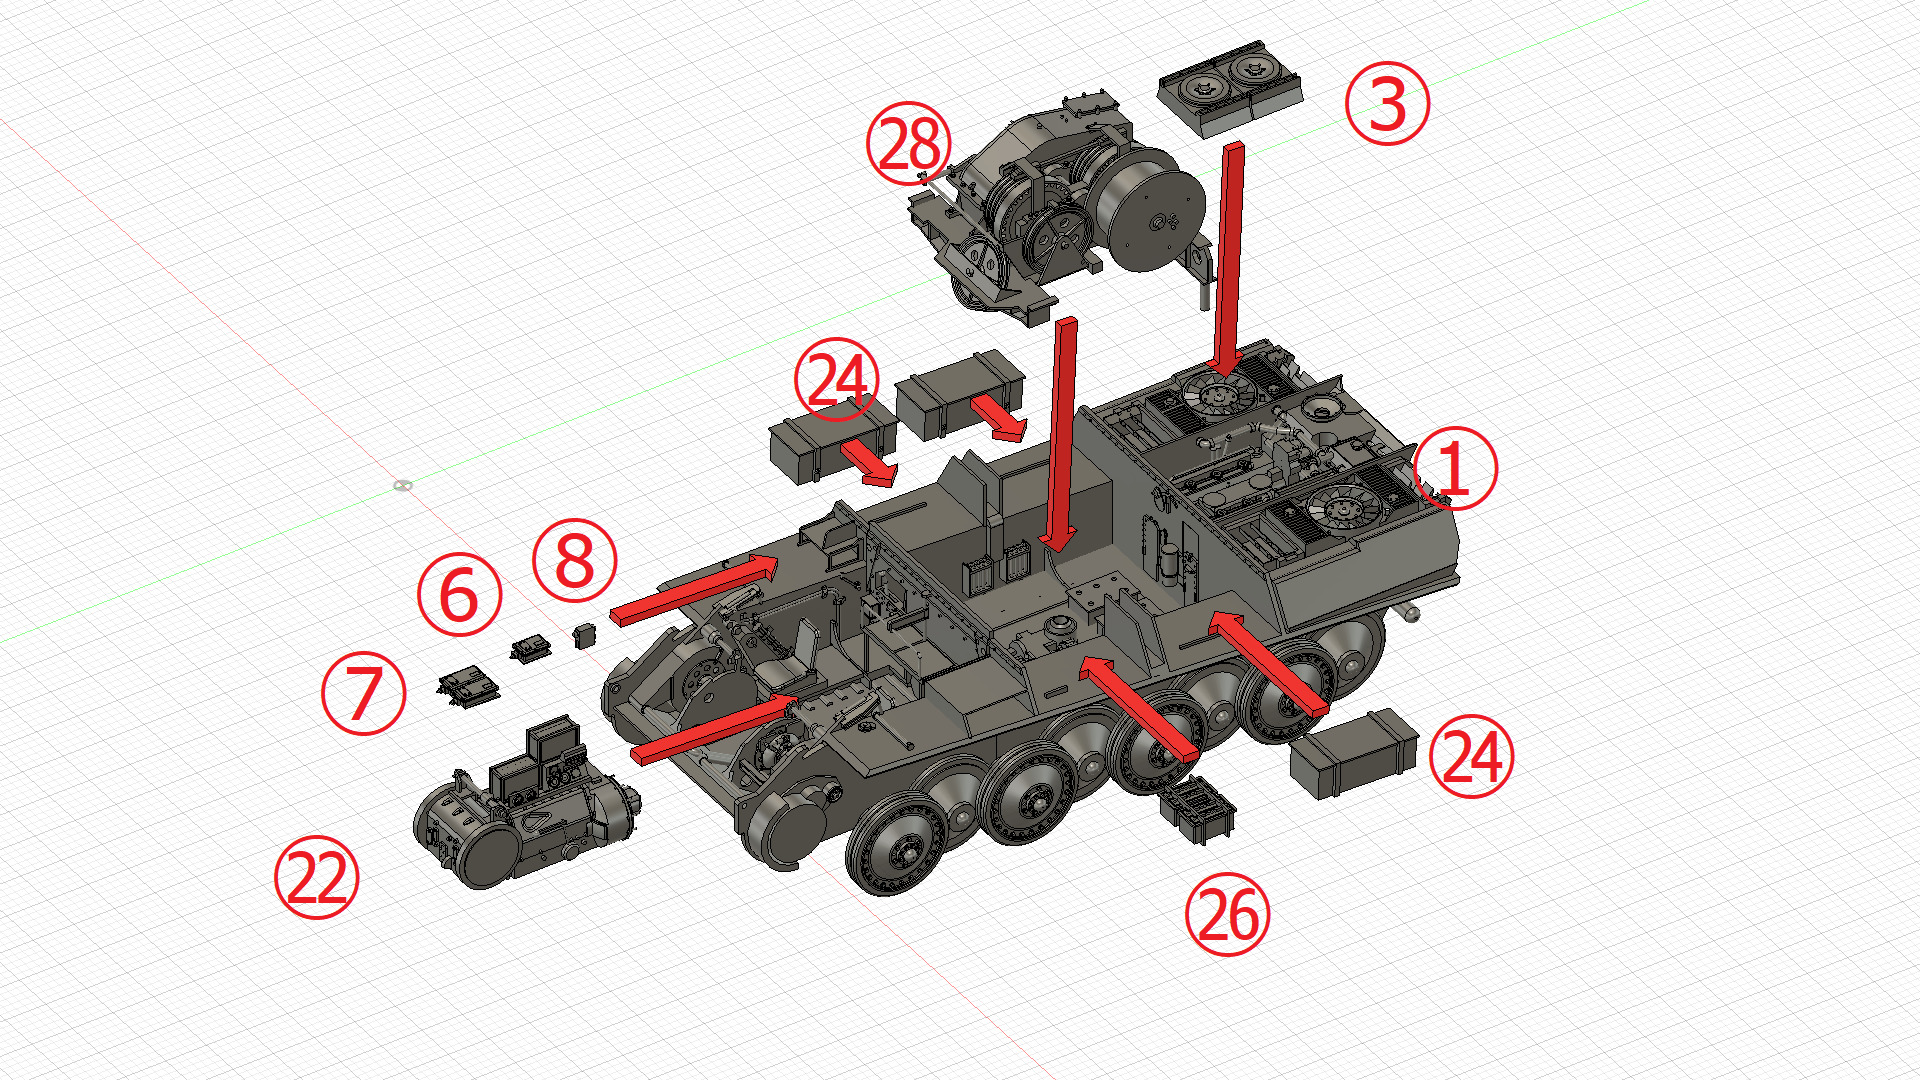
1/72 ベルゲパンター フルインテリアキット [3Dプリンタ出力品]のパーツ構成を解説します。いくつかのパーツは、壊してしまったときのために予備が入っています(梱包ミスではありません)。
I will explain the parts composition of the 1/72 Bergepanther Full Interior Kit [3D printer output product]. Some parts have spares in case they break (not a packaging mistake).
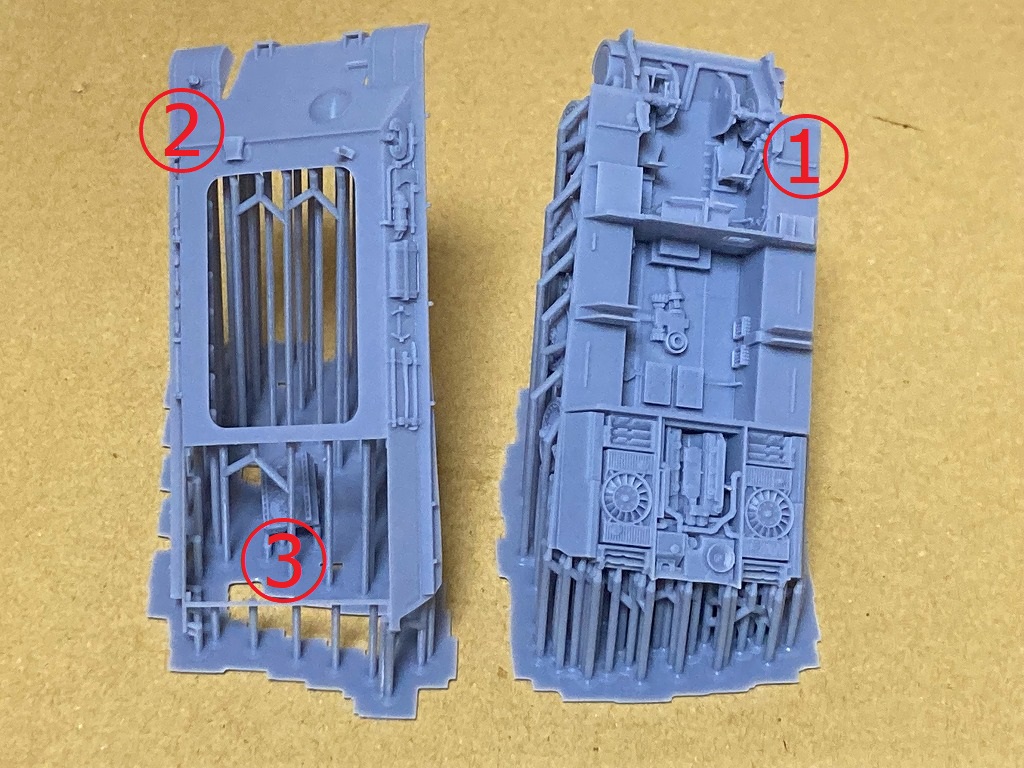
1:車体装甲 Armor
2:車体 Body
3:エアクリーナーボックス Air cleaner box
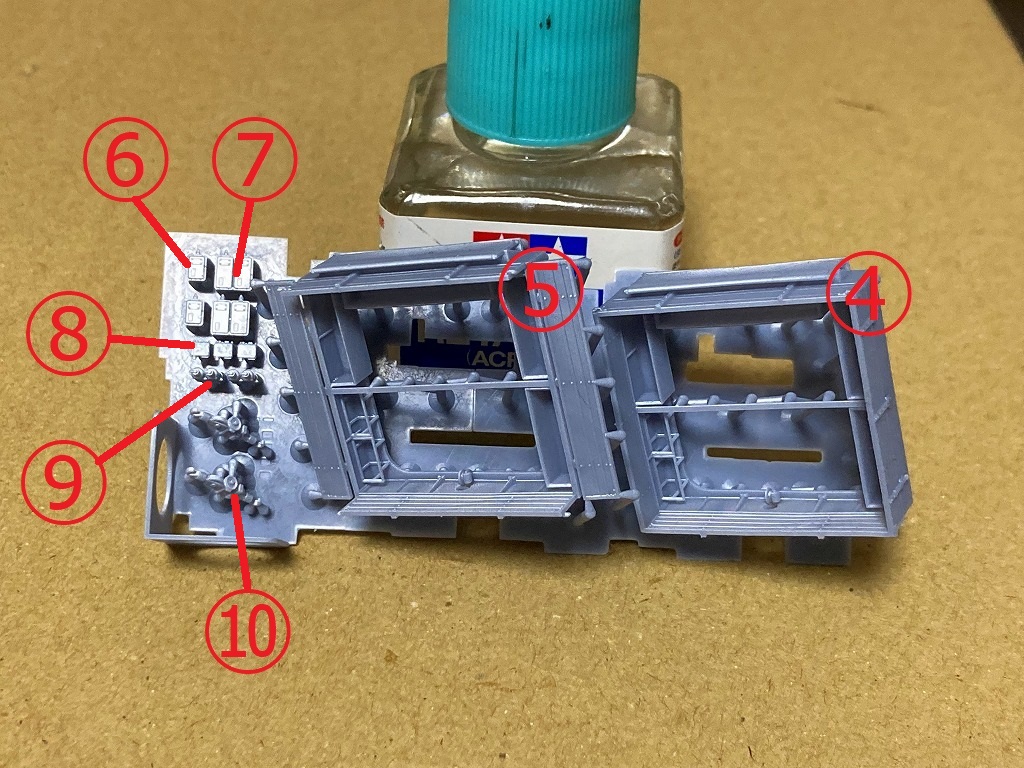
4:ウインチハウジング(閉状態) Winch housing (closed)
5:ウインチハウジング(開状態) Winch housing (open)
6:変圧器(小) Transformer (small)
7:変圧器(大) Transformer (large)
8:スイッチボックス Switch box
9:消火器 Fire extinguisher
10:クレーンフック Crane hook
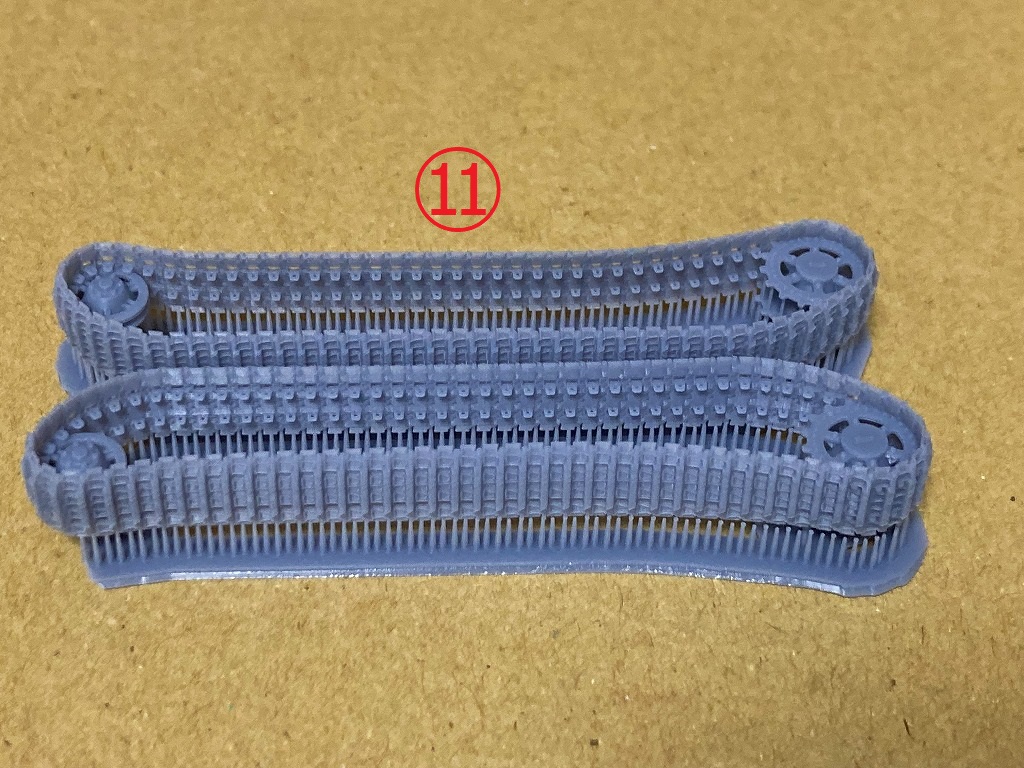
11:履帯 Tracks
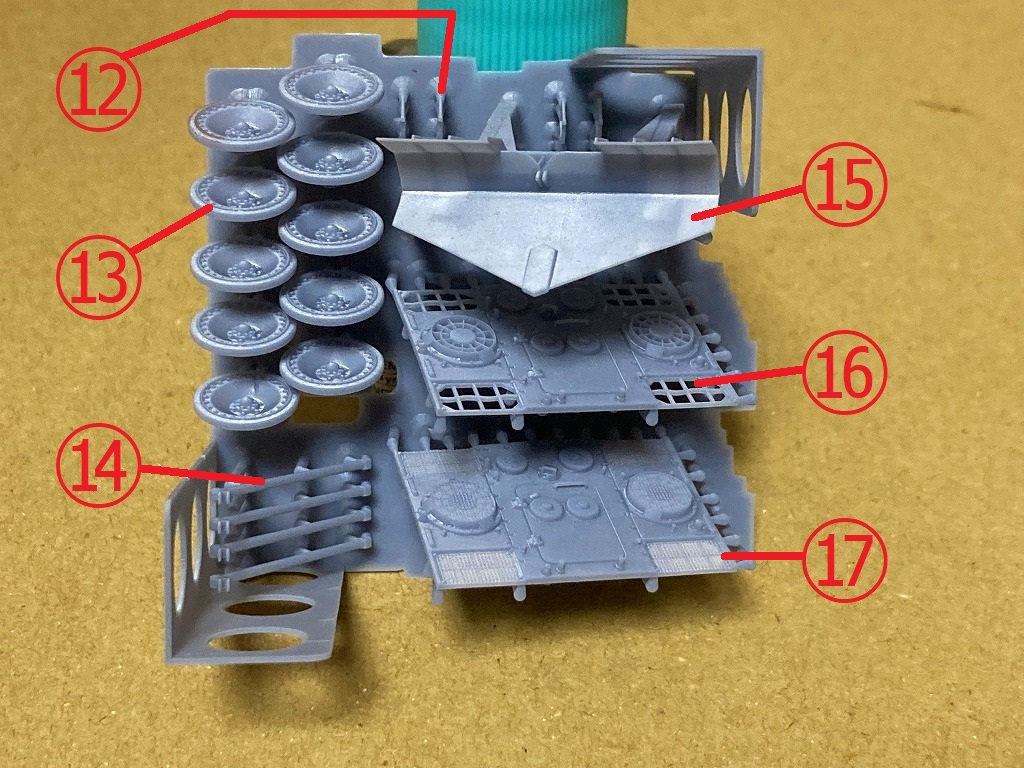
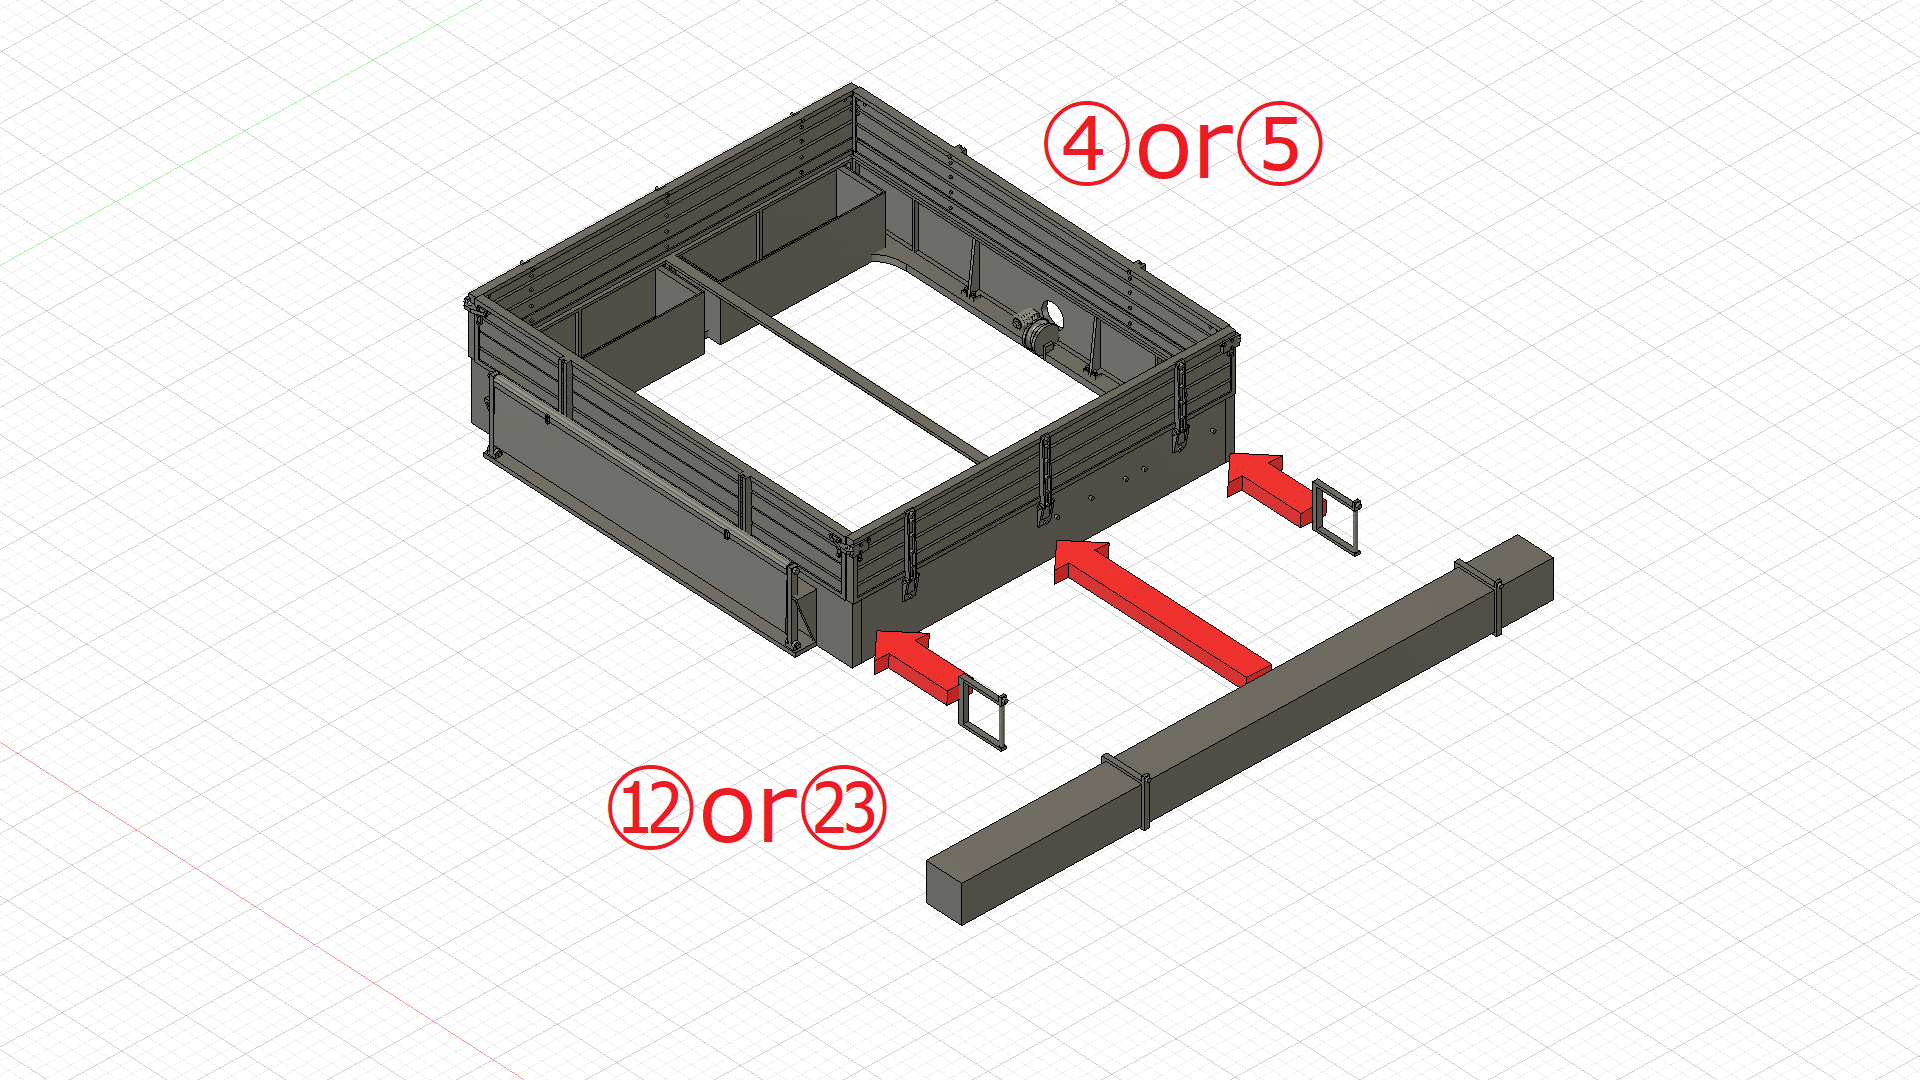
12:軟弱地脱出用角材ステー Support rack of Un-ditching Beam
13:転輪 Rolling wheel
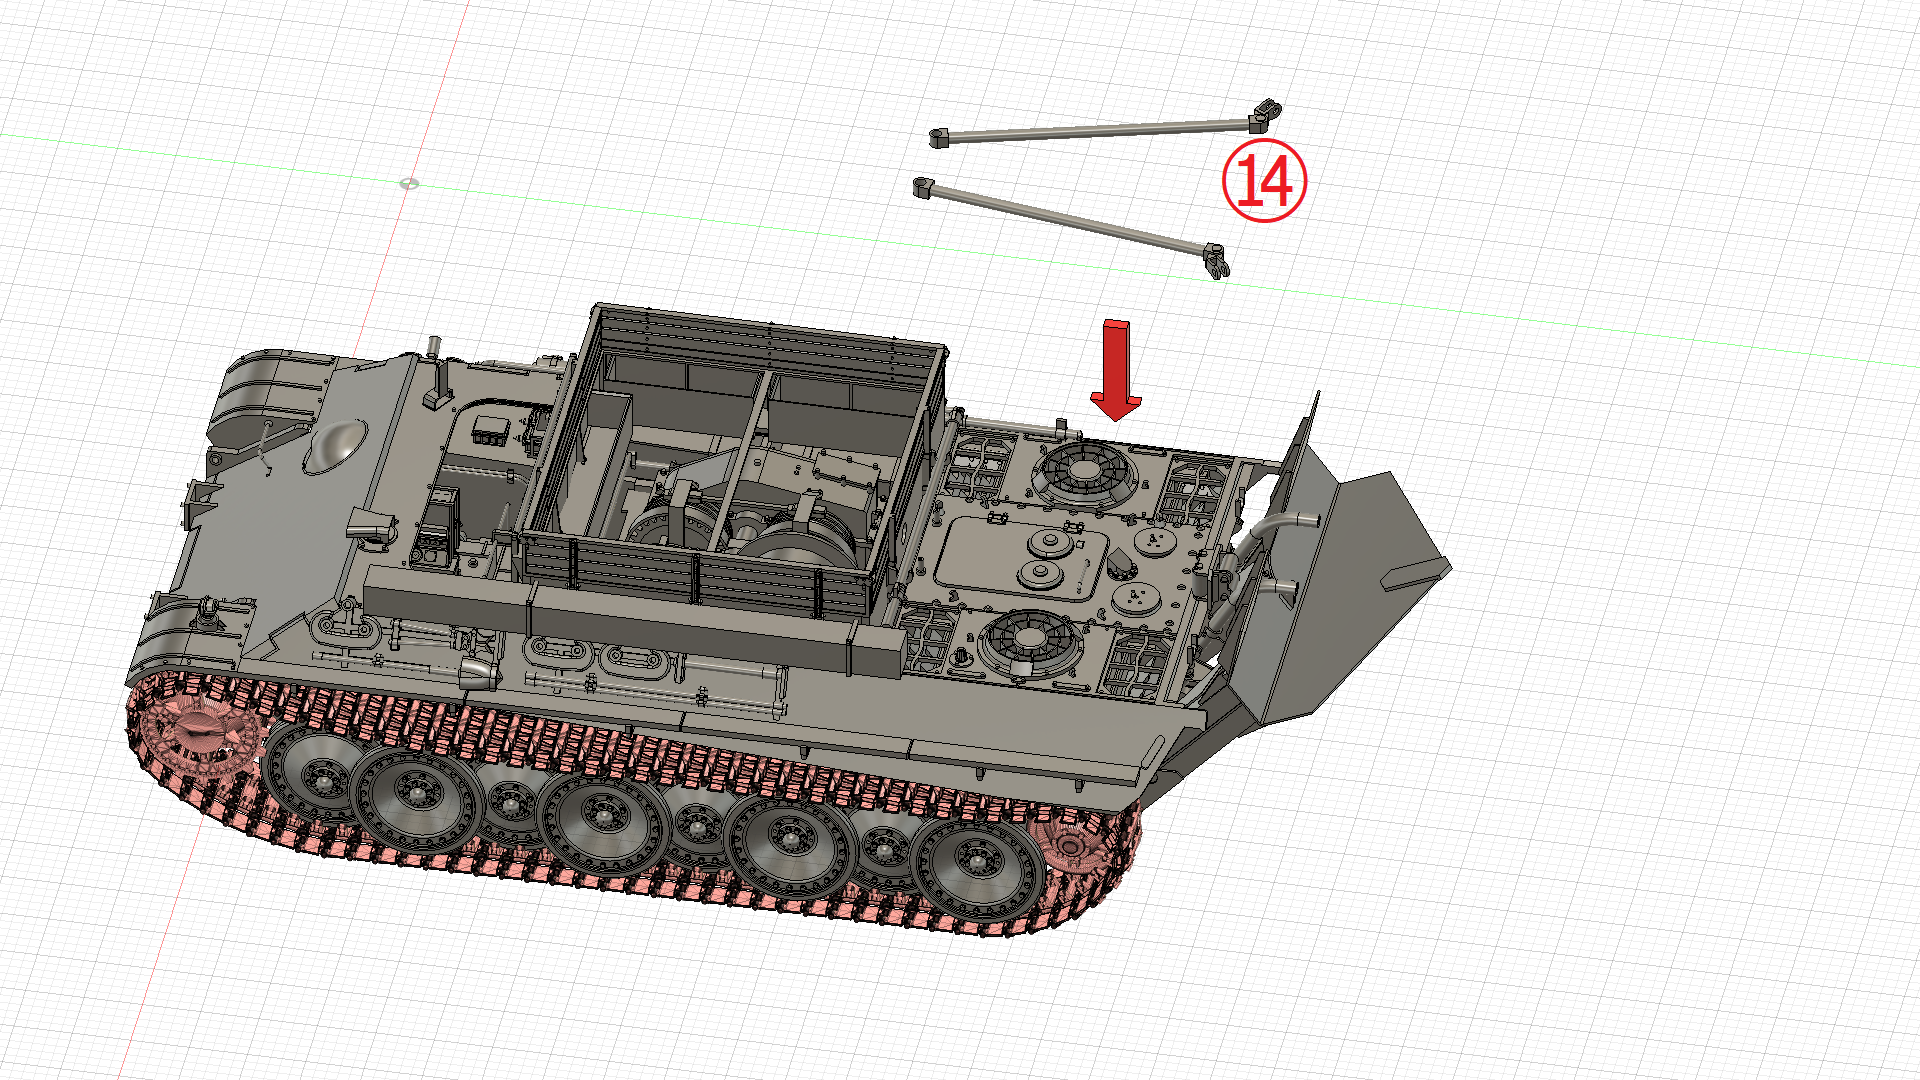
14:牽引バー Towing bar
15:スペード Spade
16:エンジンルームトップパネル(メッシュなし) Top panel of Engine room (without mesh)
17:エンジンルームトップパネル(メッシュあり) Top panel of Engine room (with mesh)
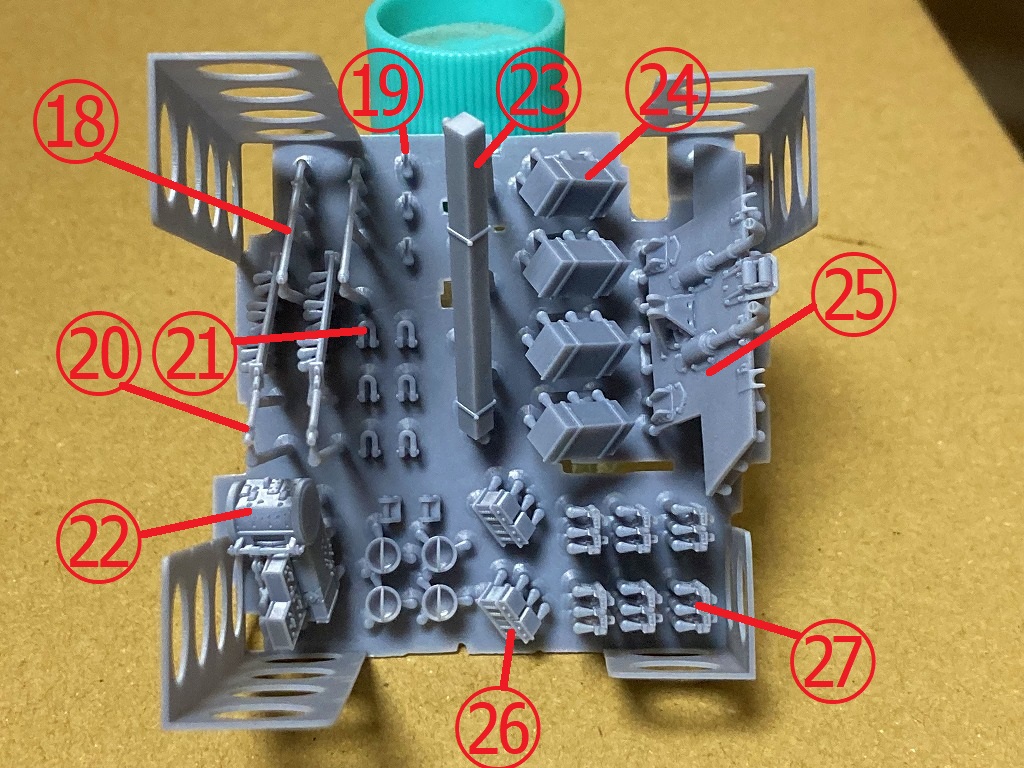
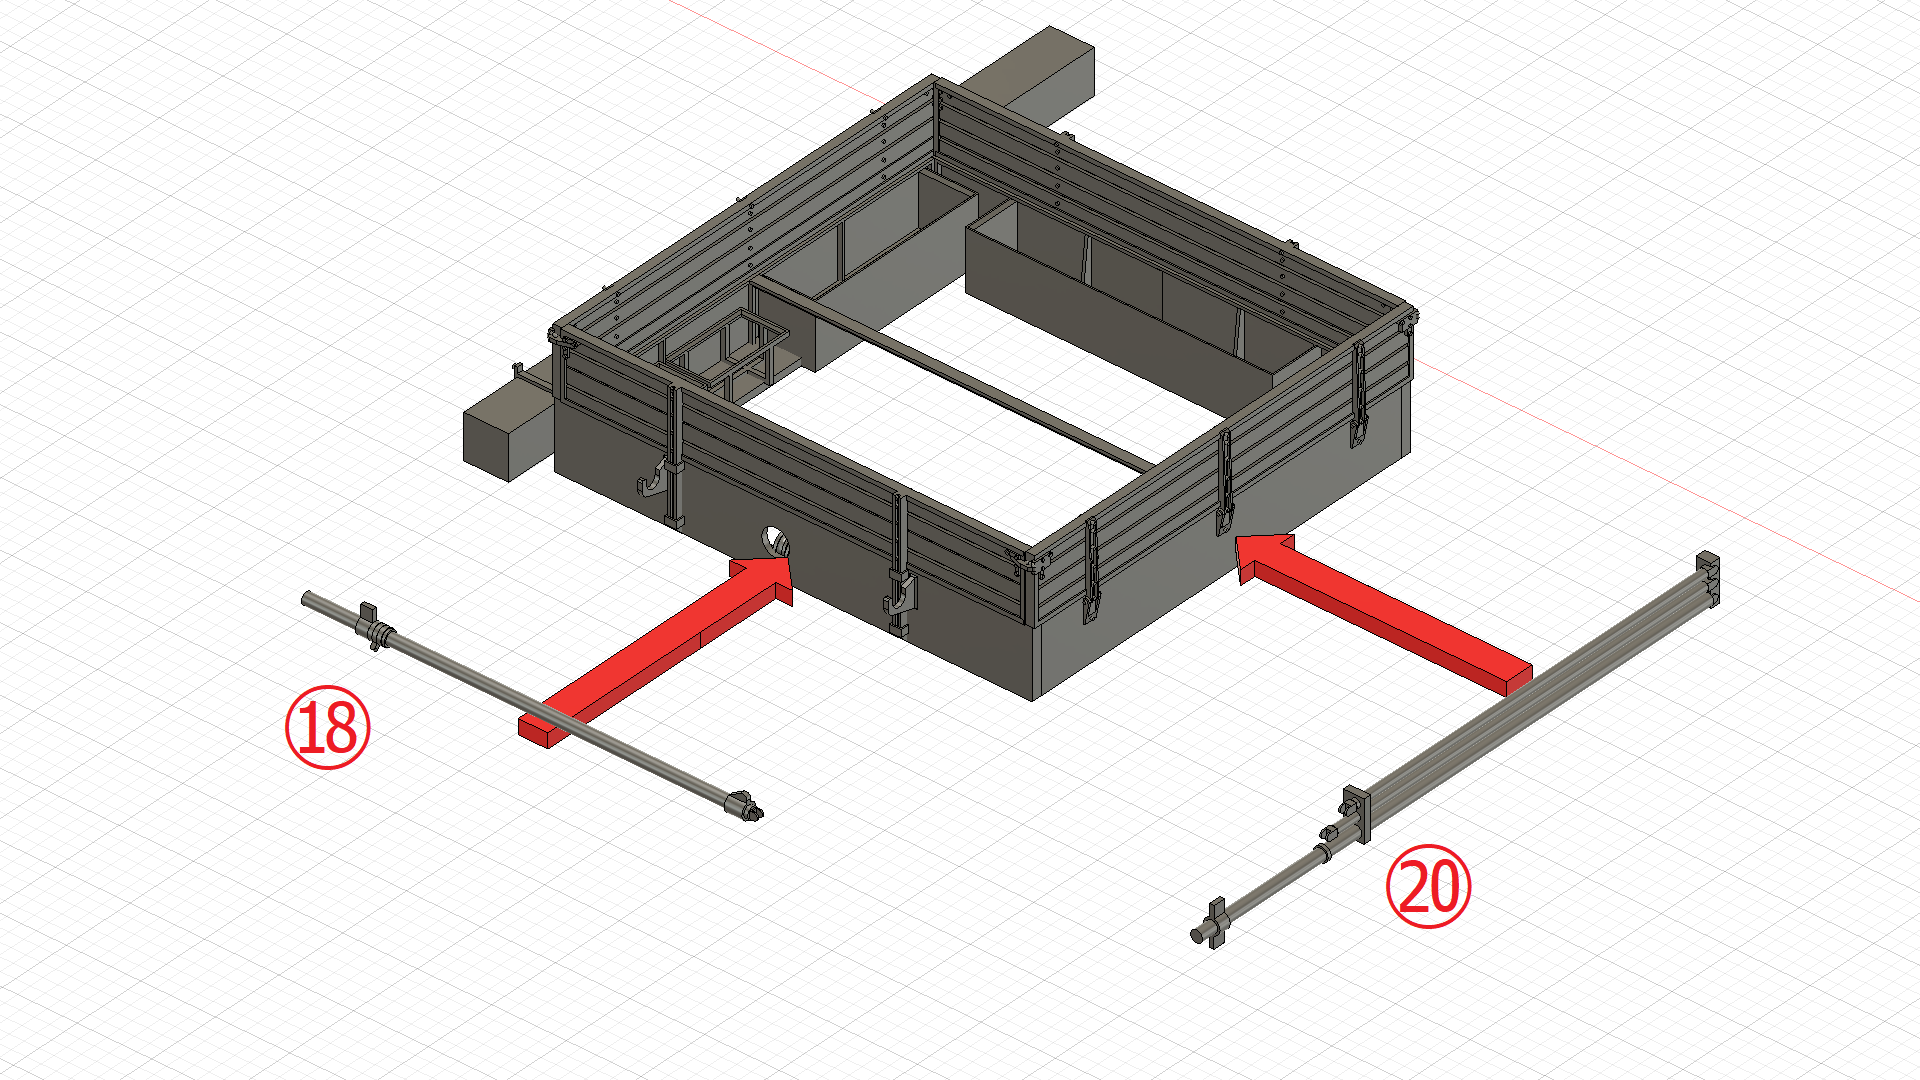
18:収納状態クレーン1 Storage state Crane 1
19:牽引ワイヤー先端 Tow wire tip
20:収納状態クレーン2 Storage state Crane 2
21:シャックル Shackle
22:トランスミッション Transmission
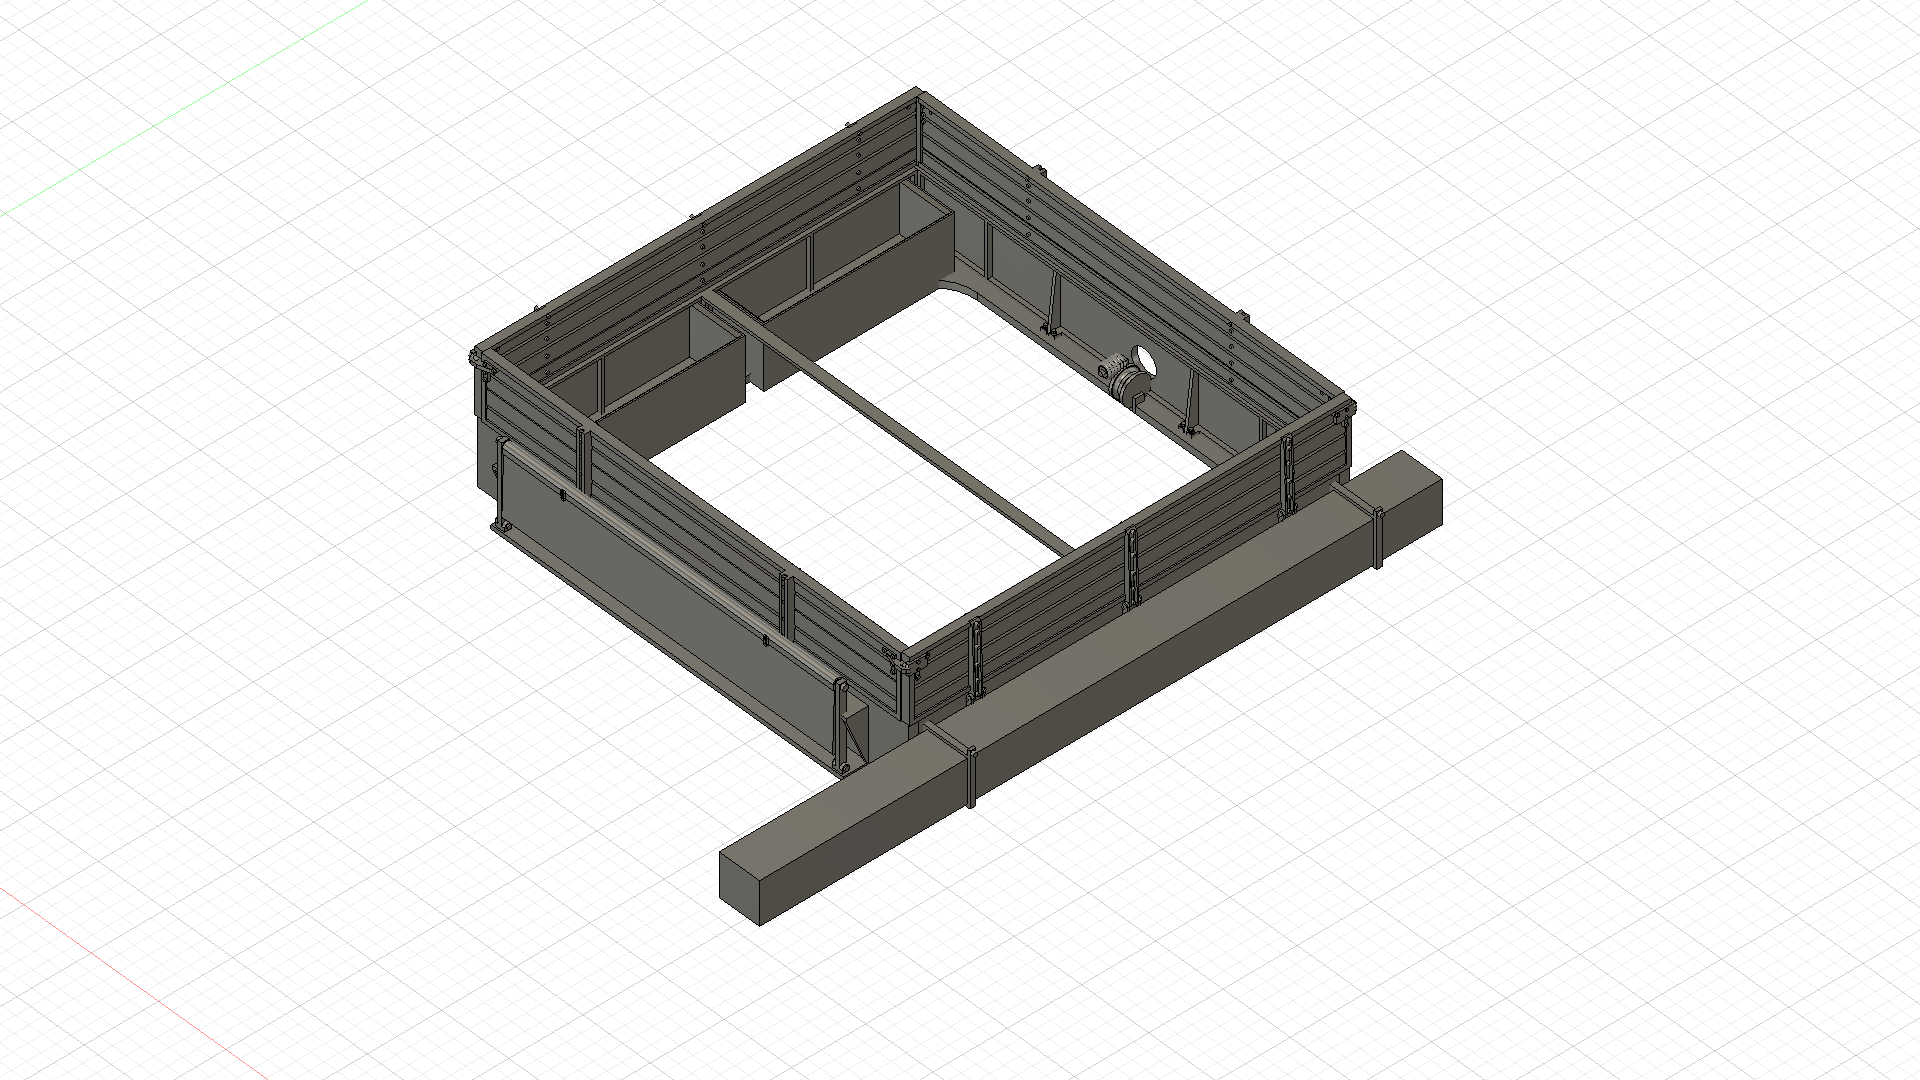
23:軟弱地脱出用角材 Un-ditching Beam
24:雑具箱 Miscellaneous goods box
25:エンジンルーム後部パネル Rear panel of Engine room
26:バッテリー Storage battery
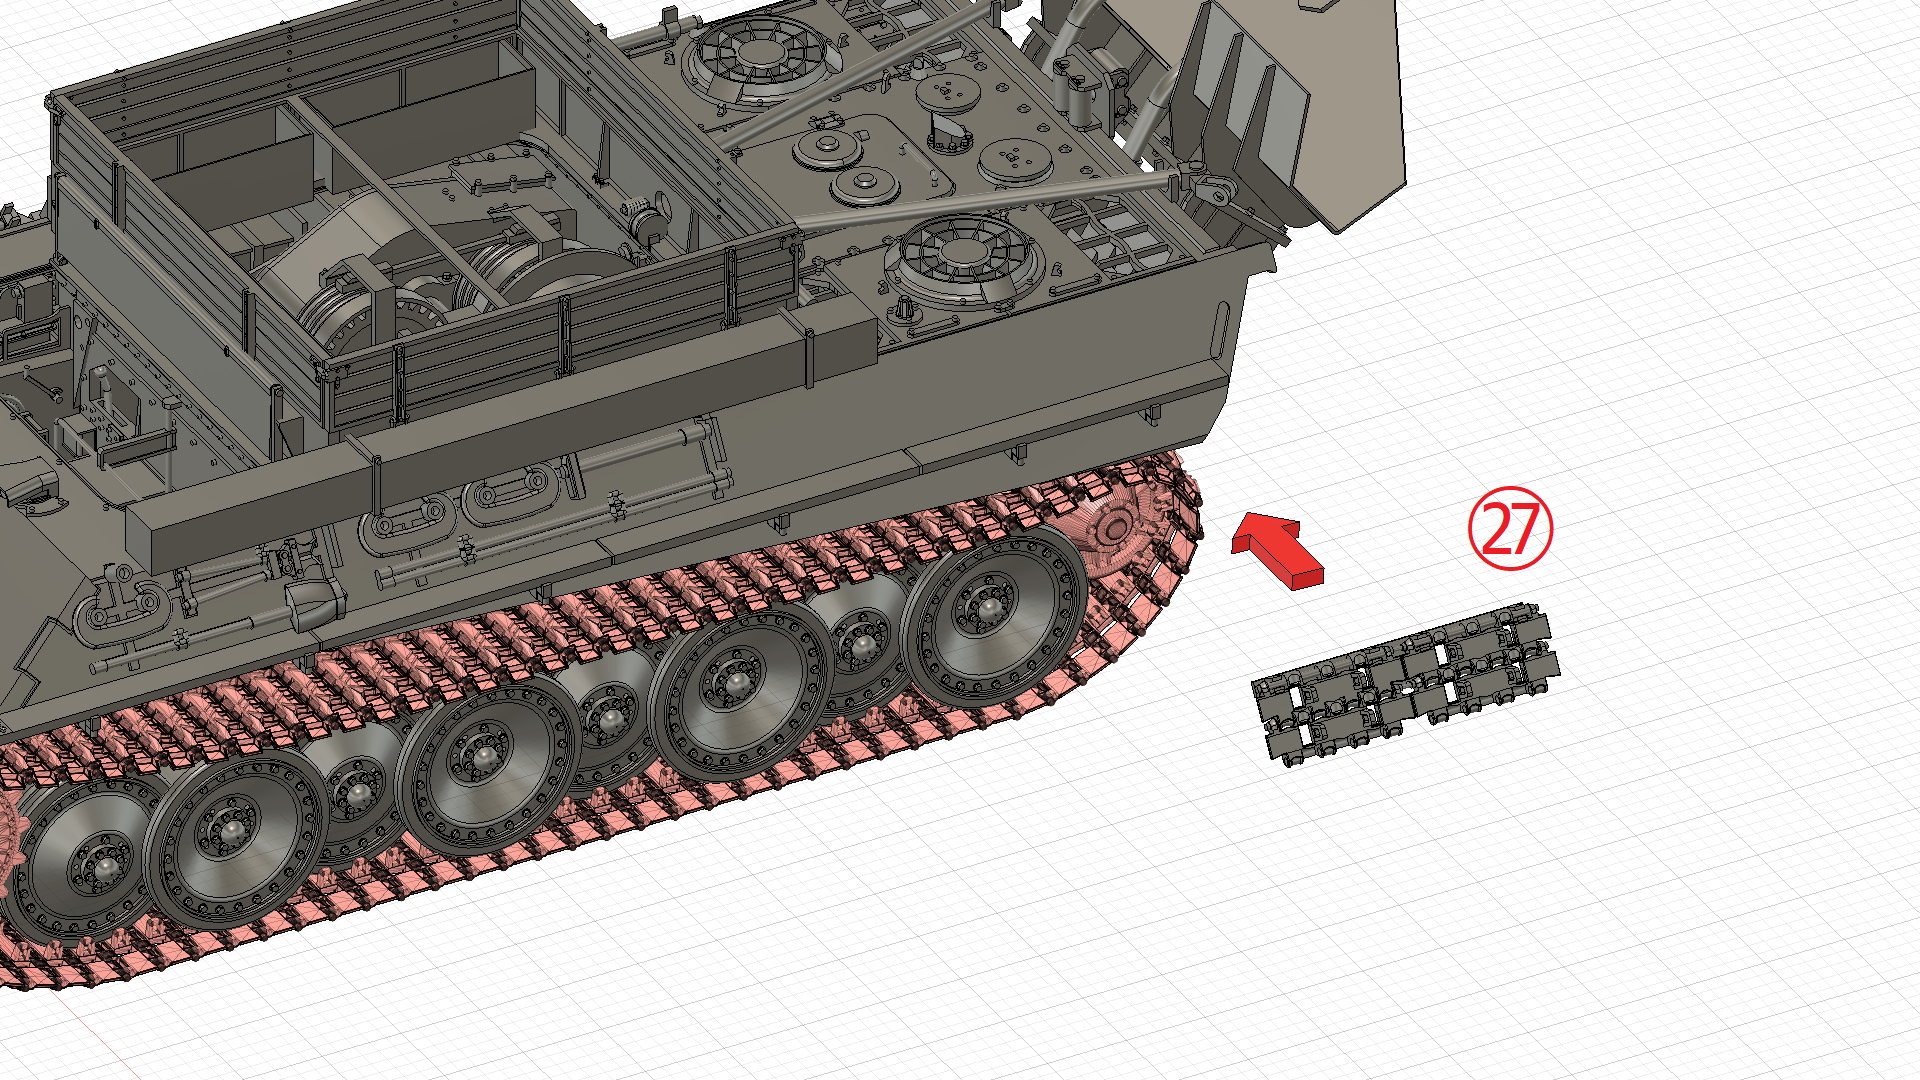
27:予備履帯 Spare tracks
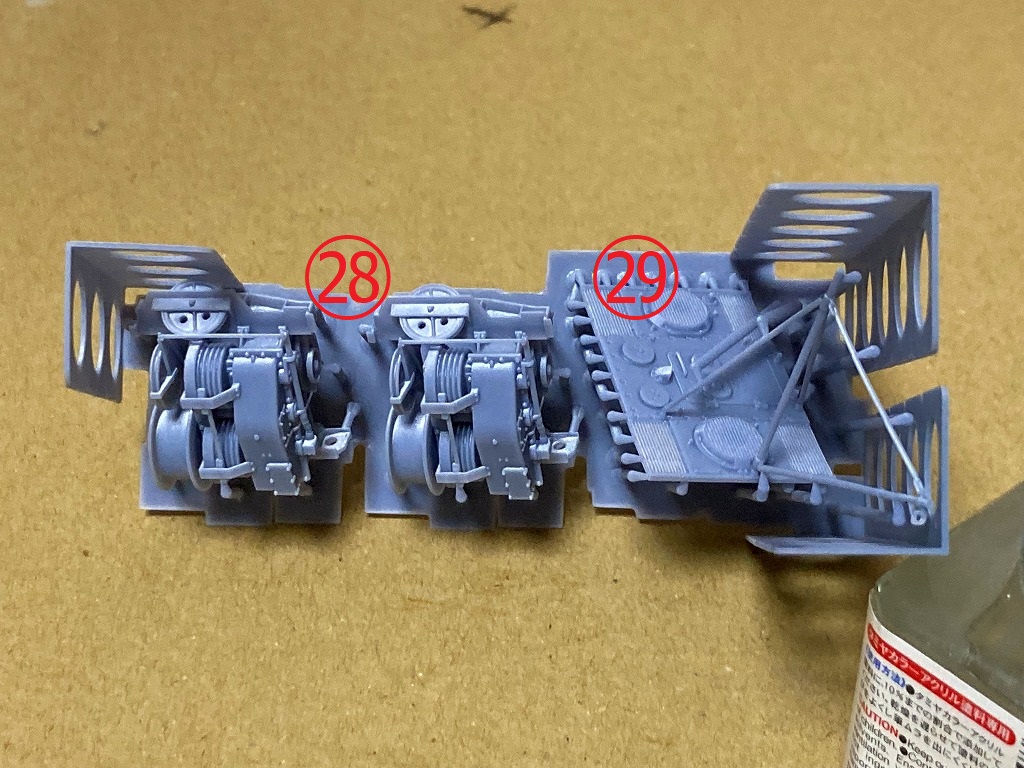
28:ウィンチ Winch
29:エンジンルームトップパネル(展開状態クレーン付き) Top panel of Engine room (with Crane)
組立(Painting and assembly)
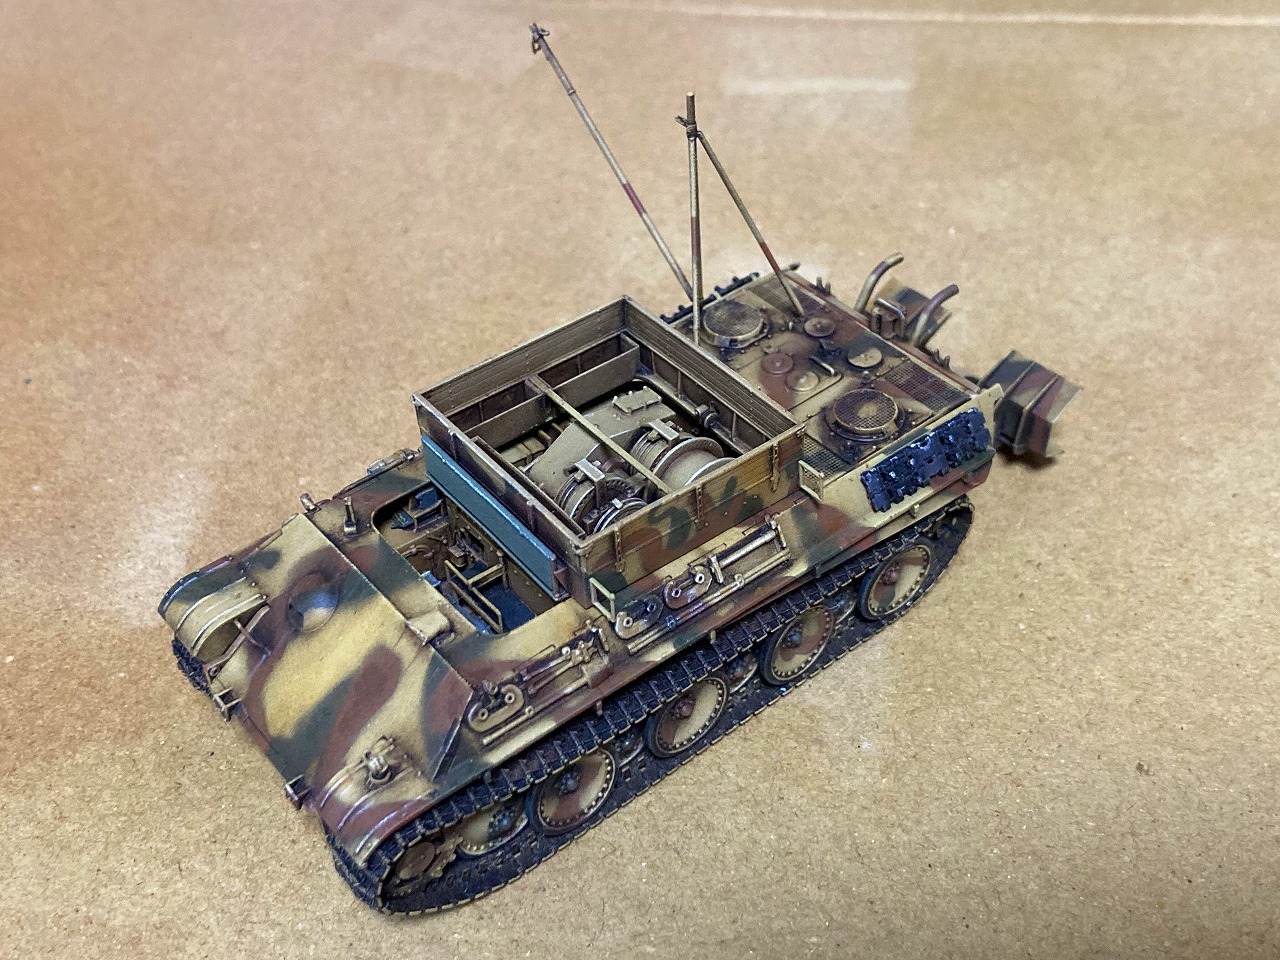
それぞれのパーツを、組み立てる前に全て塗装します。その後、各パーツを組み立てます。
素材がレジンであるため、事前にサフェーサーを塗布することをお勧めします。
Since the material is resin, it is recommended to apply the surfacer in advance.
以下の画像をクリックすると、大きな画像を開くことができます。
You can open a larger image by clicking on the image.
車体の組立て Assembling the Body
履帯・転輪の組立て Assembling the Tracks and wheels
後部パネルの組立て Assembling the Rear panel
ウィンチハウジングの組立て1 Assembling the winch housing 1
ウィンチハウジングの組立て2 Assembling the winch housing 2
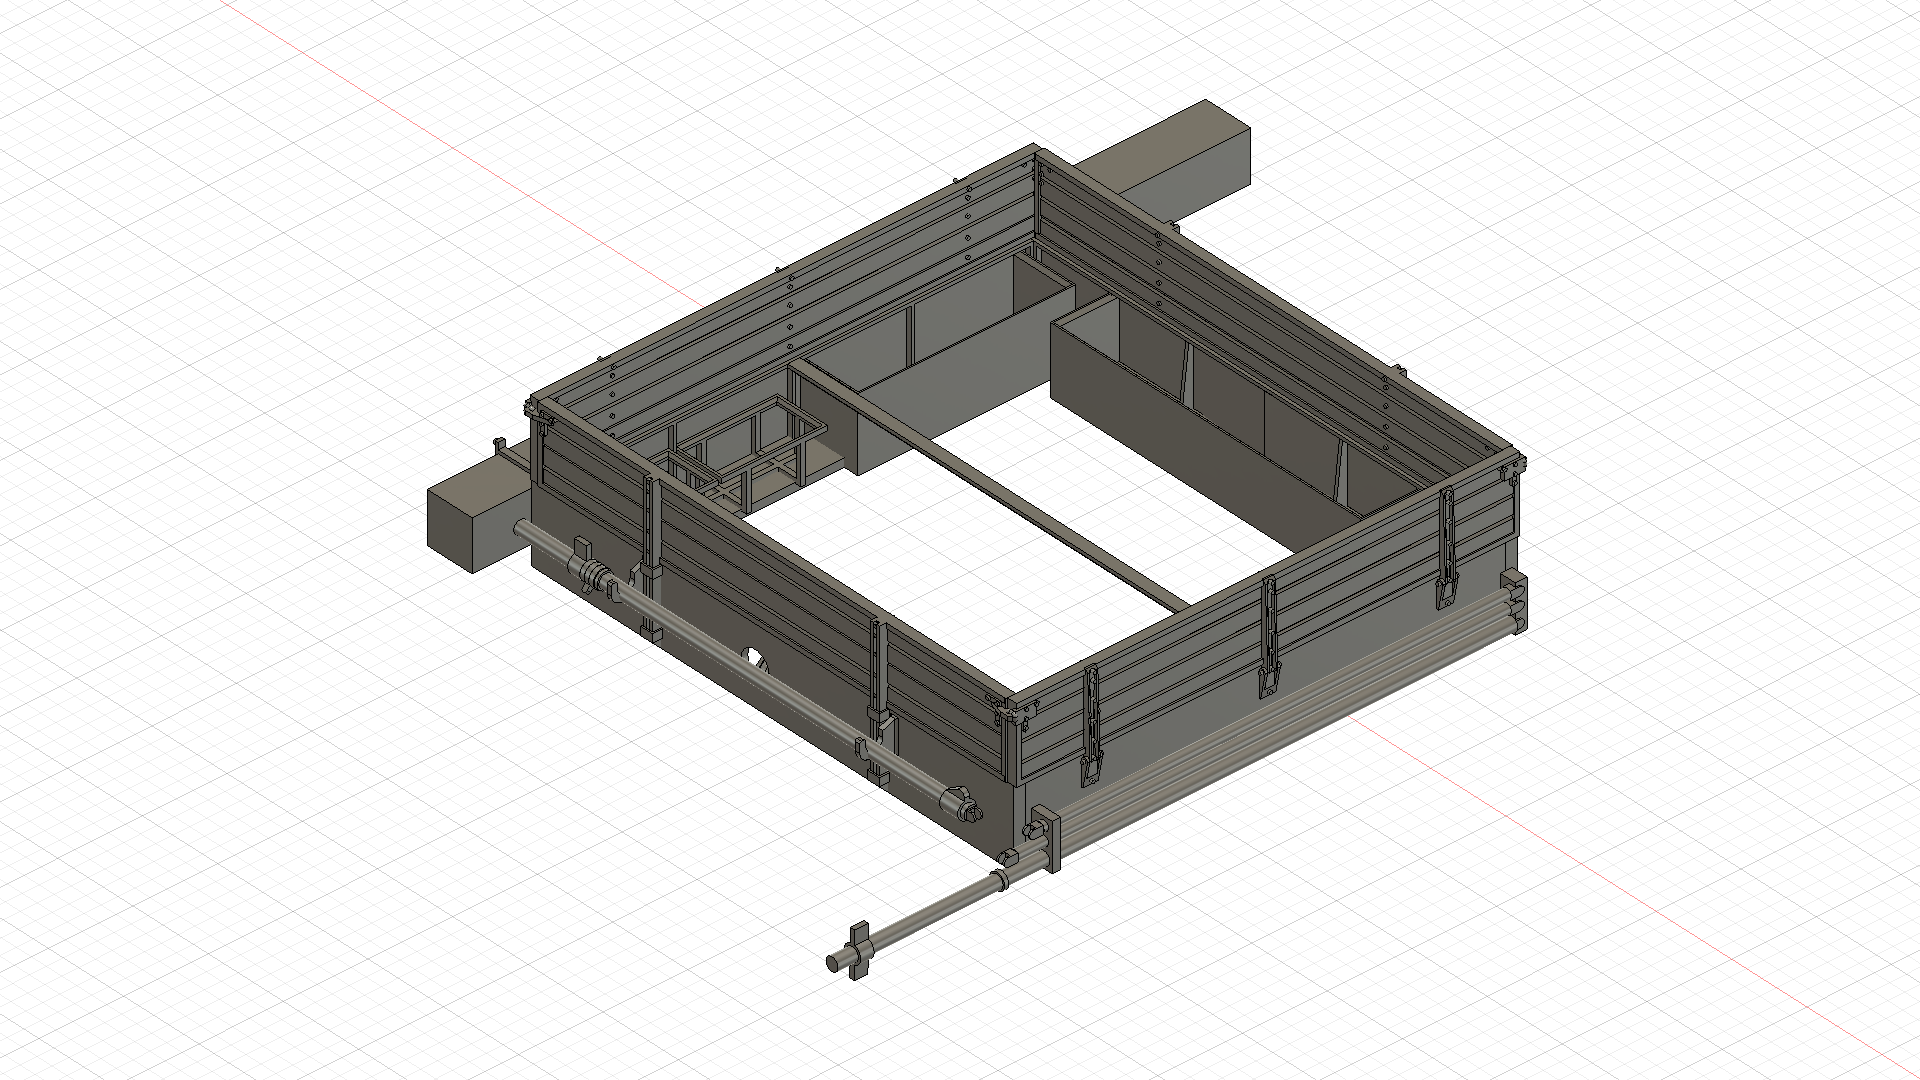
車体装甲の組立て Assembling the Armor
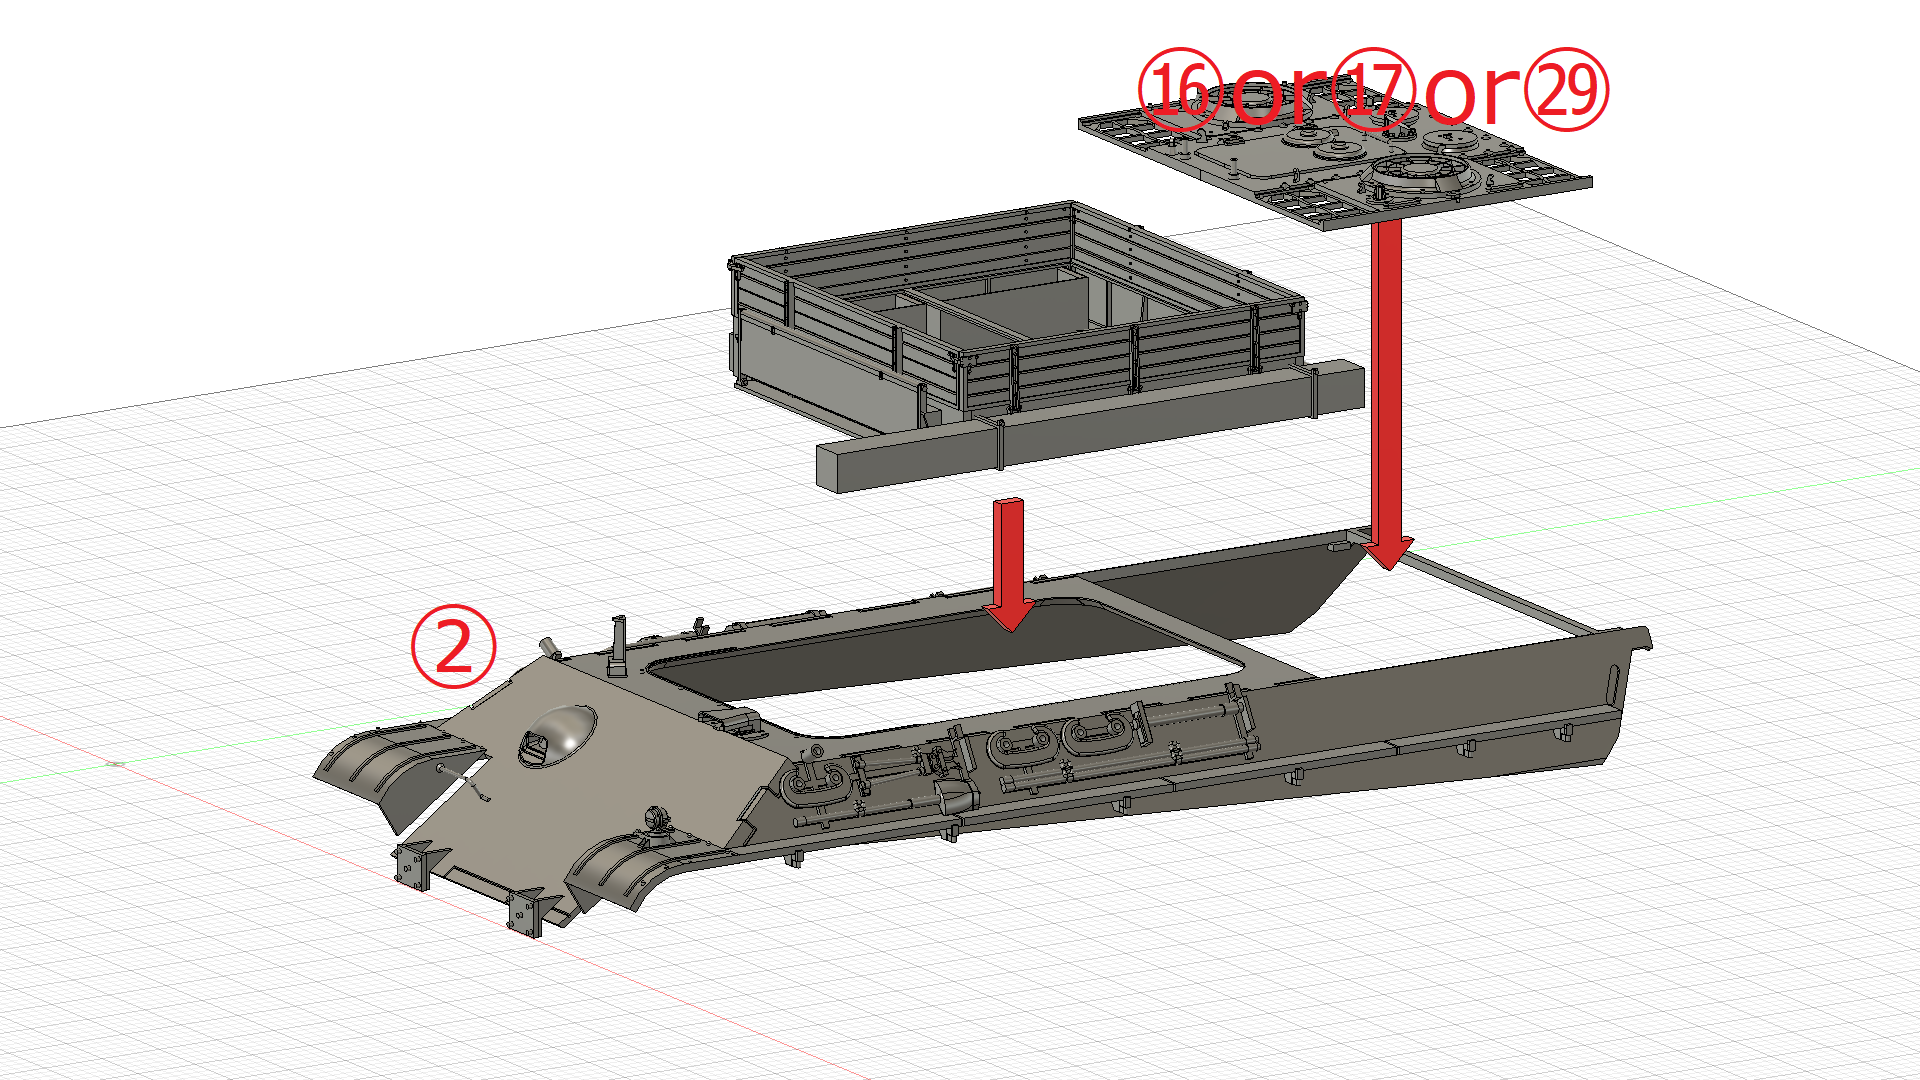
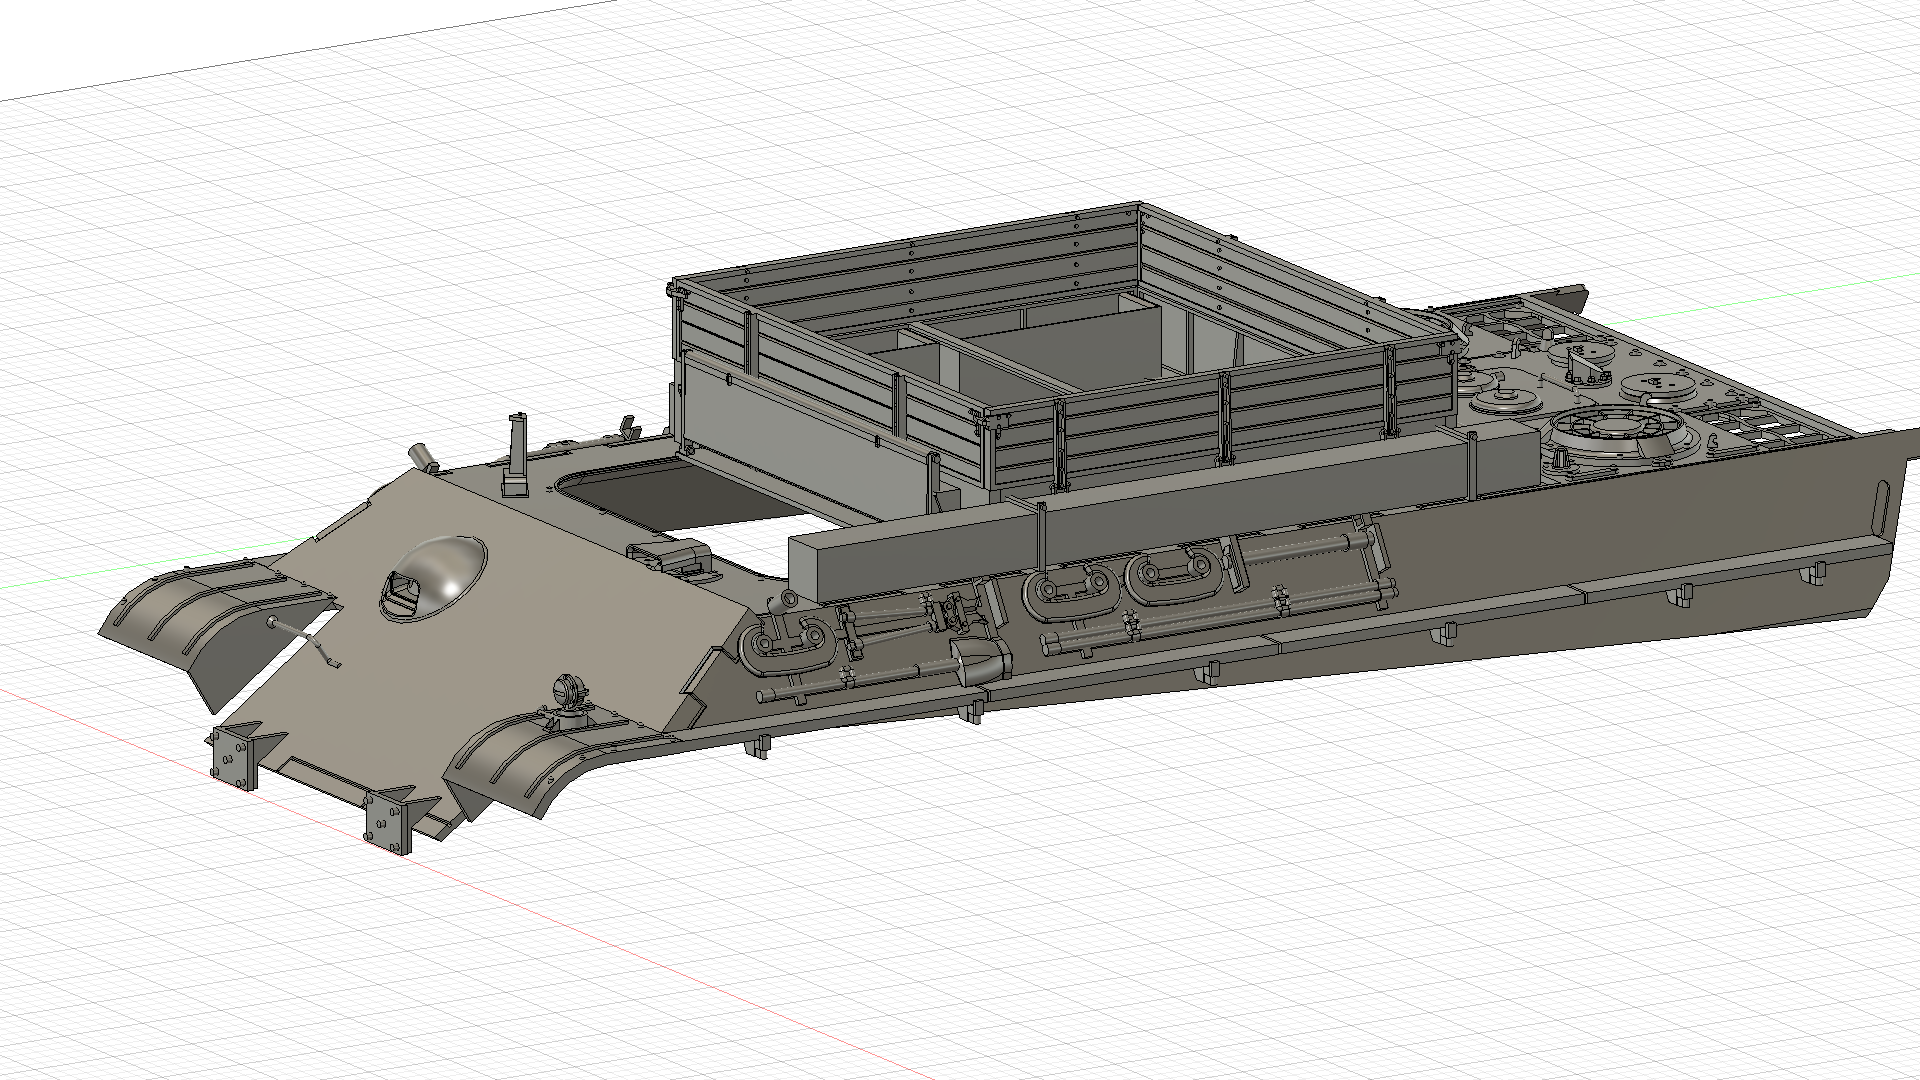
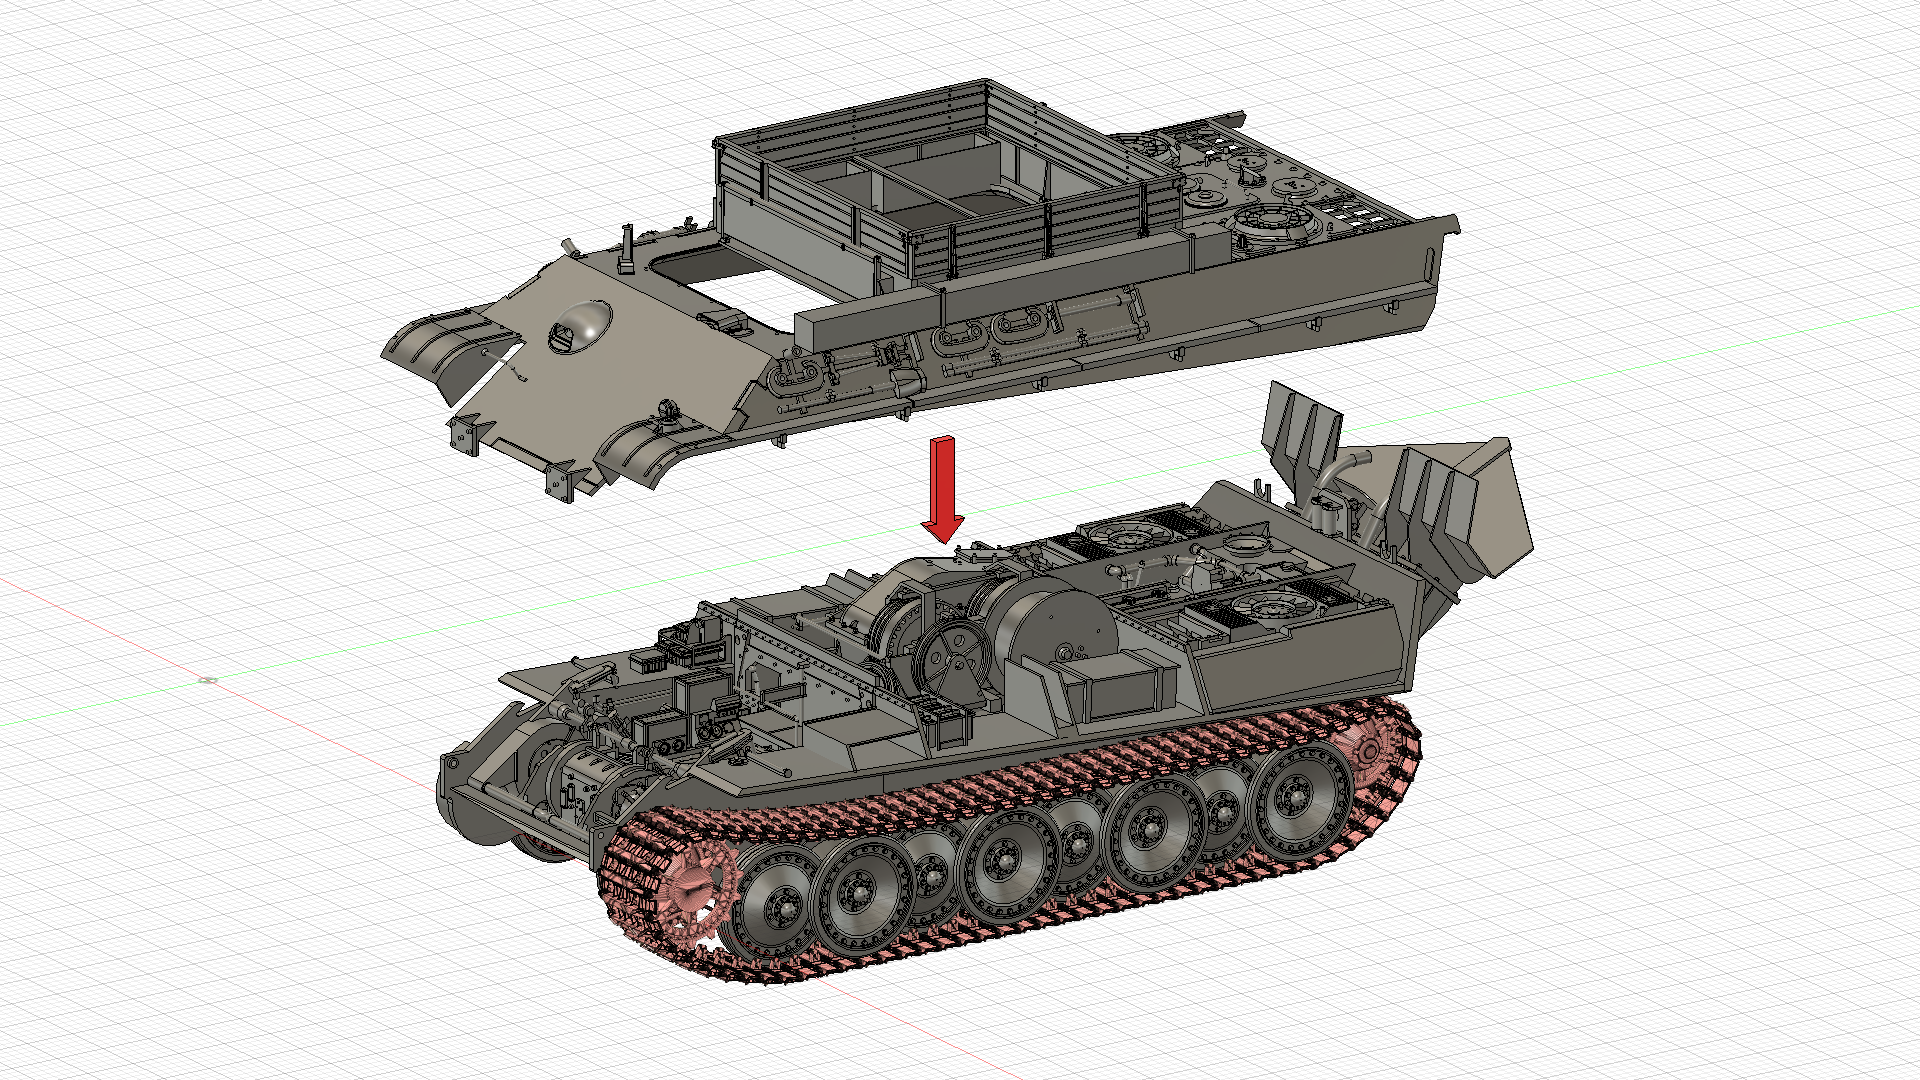
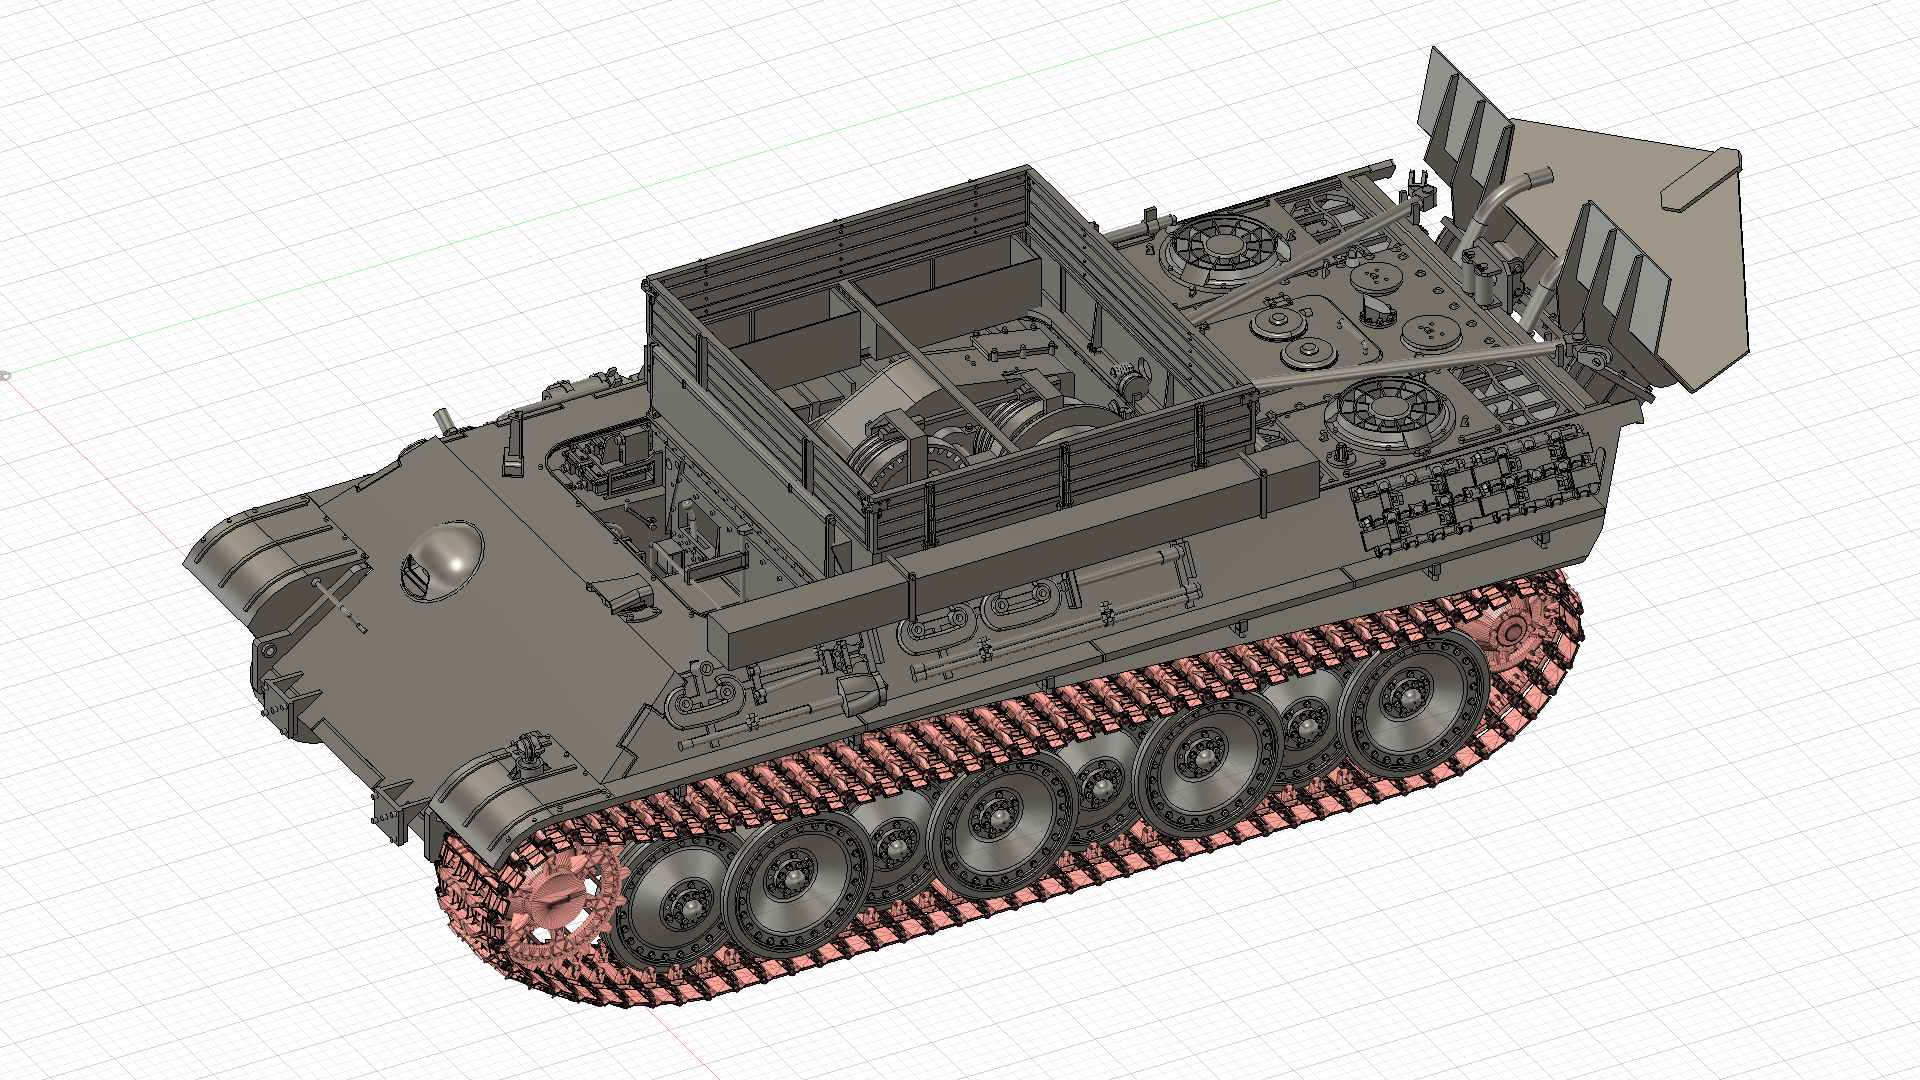
車体と車体装甲の組立て Coupling of the body and armor
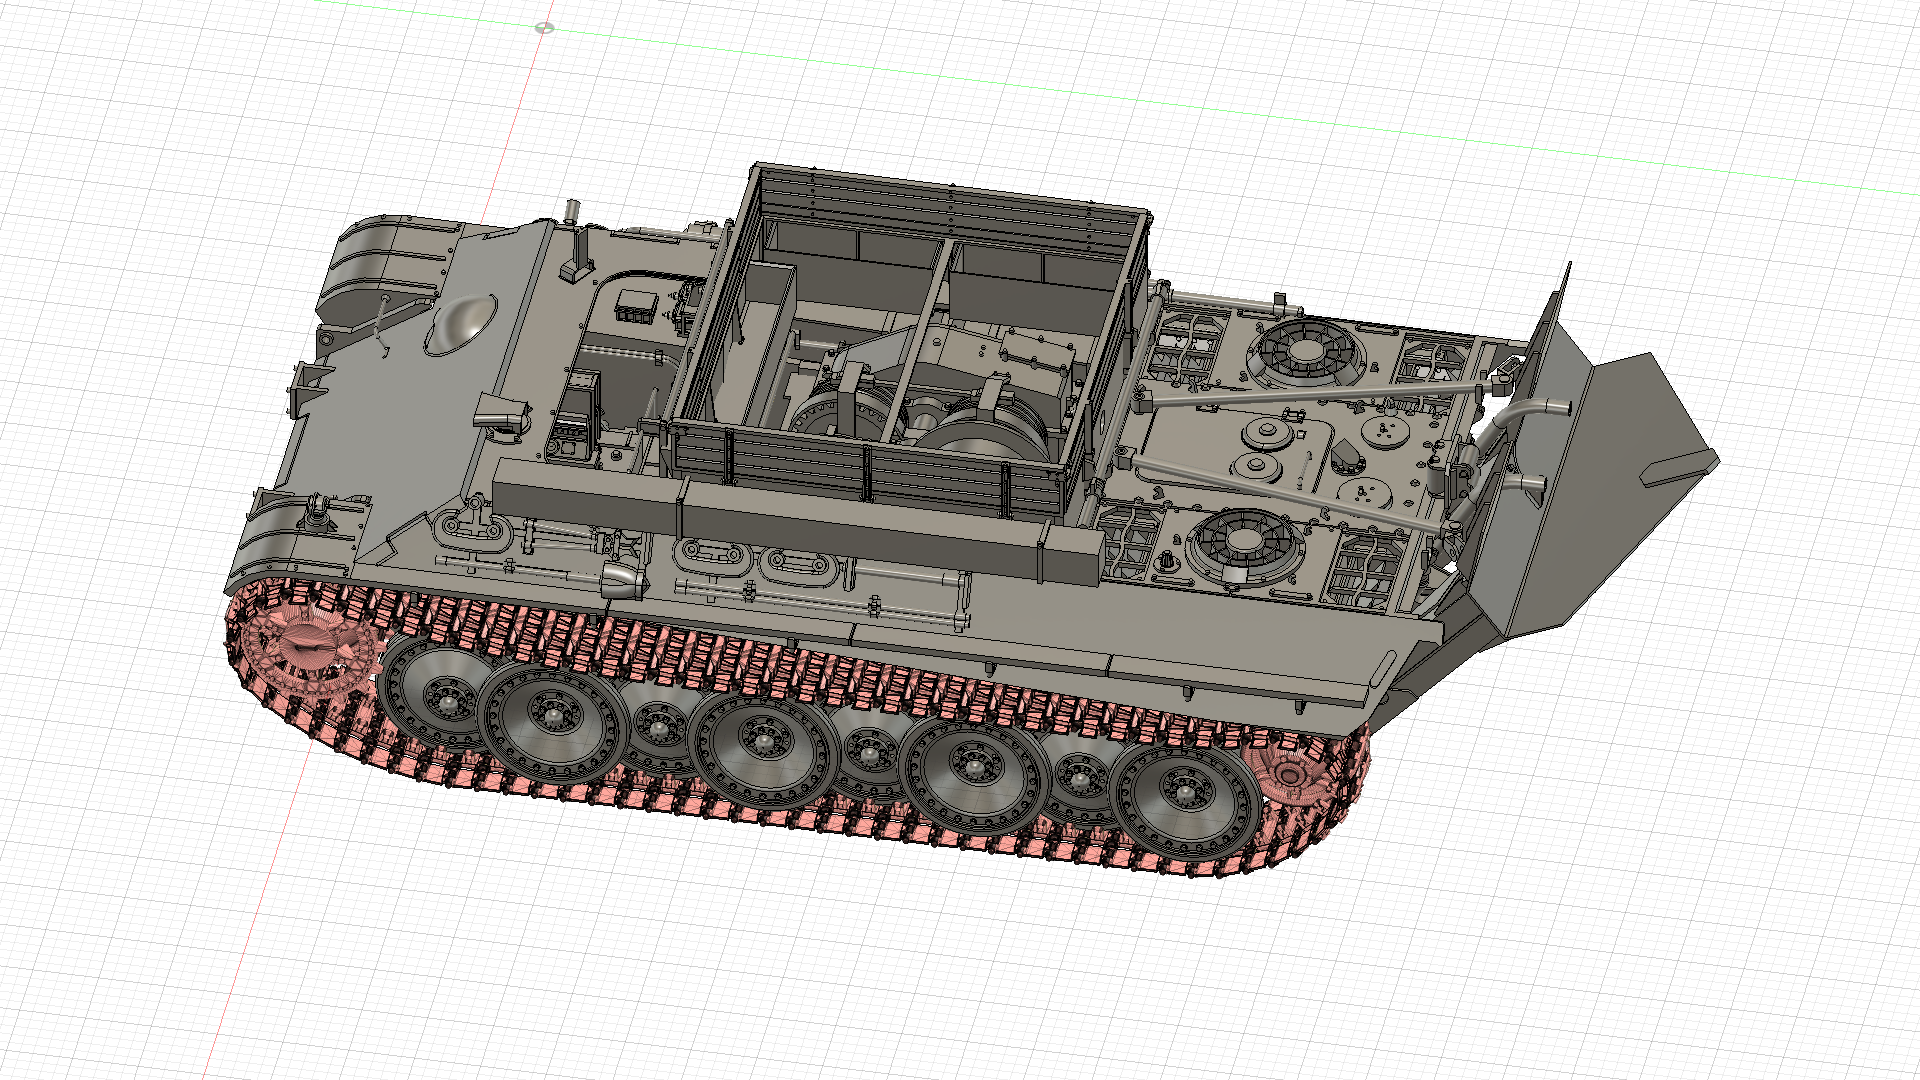
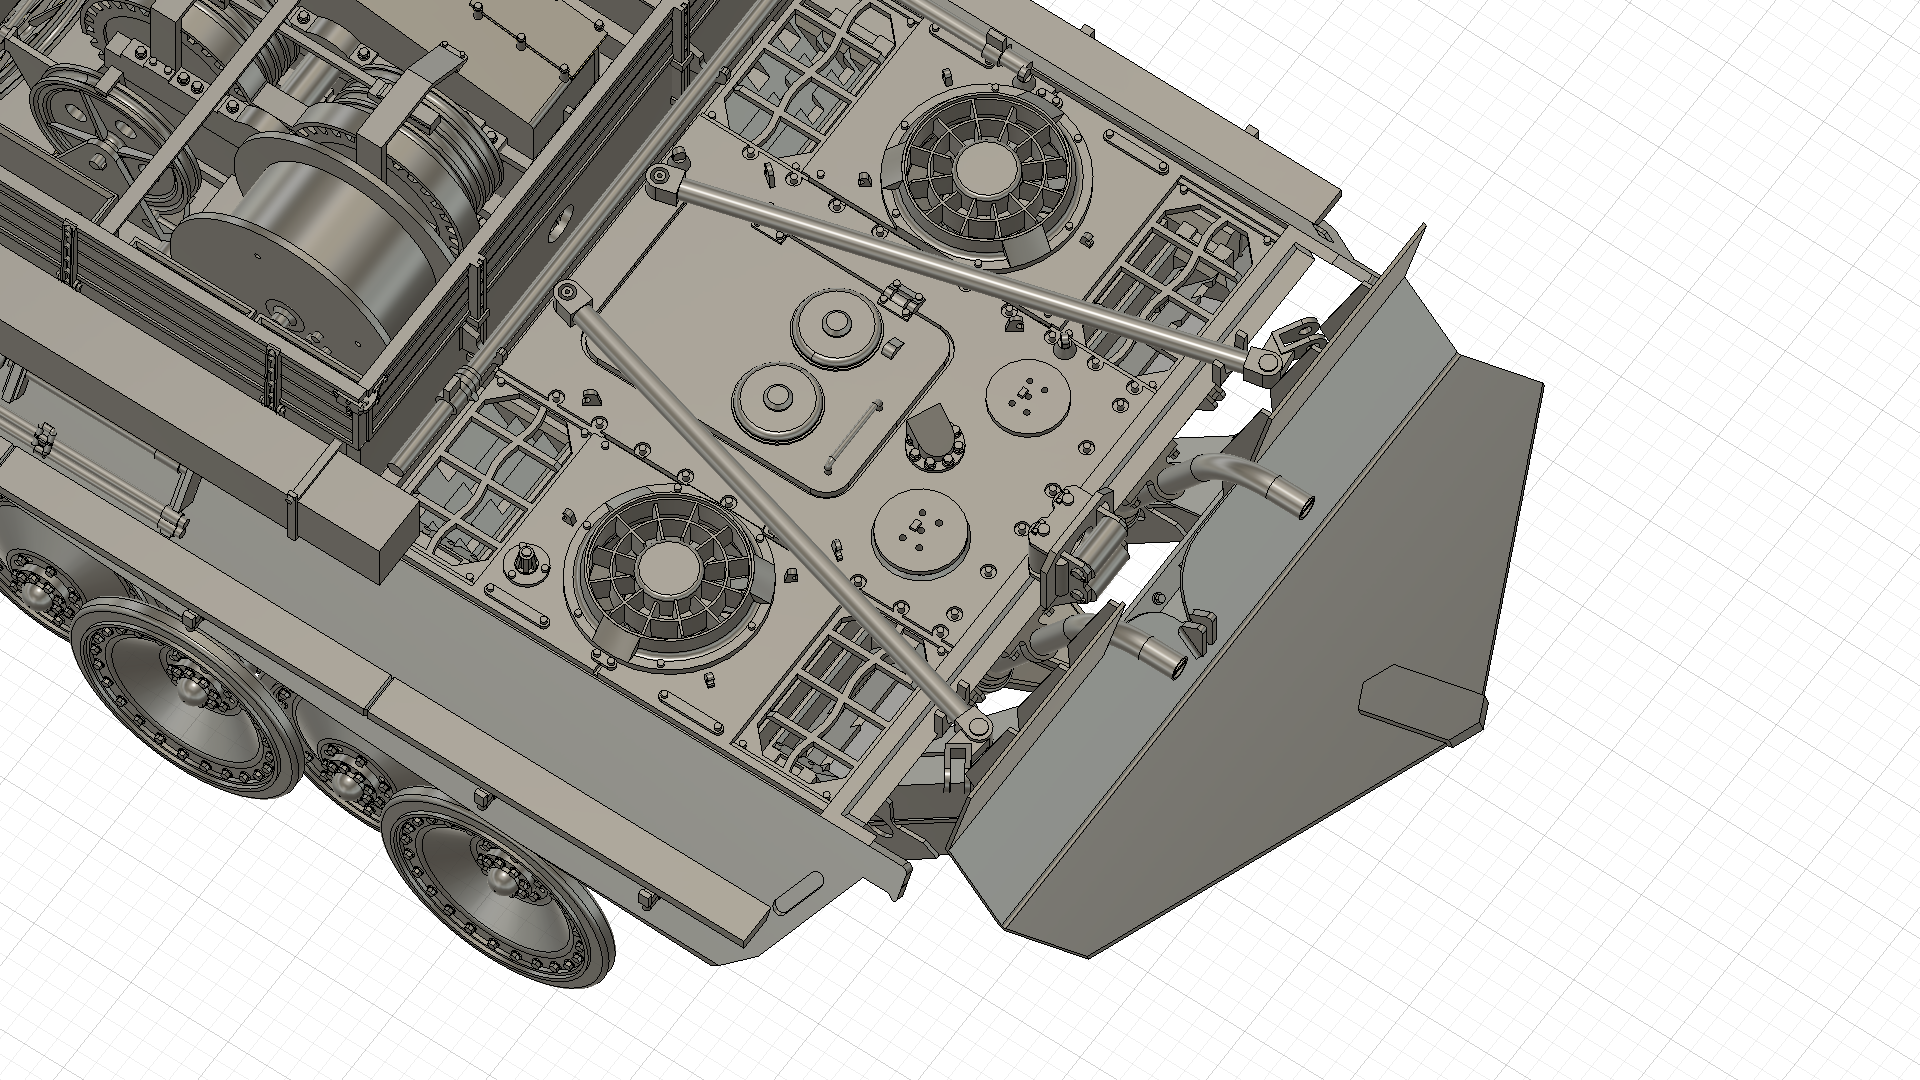
牽引バーの組立て Assembling the Towing bar
予備履帯の組立て Assembling the Spare tracks
組立のポイント Precautions for assembly
パーツ下面のふくらみについて About the bulge on the bottom of the parts
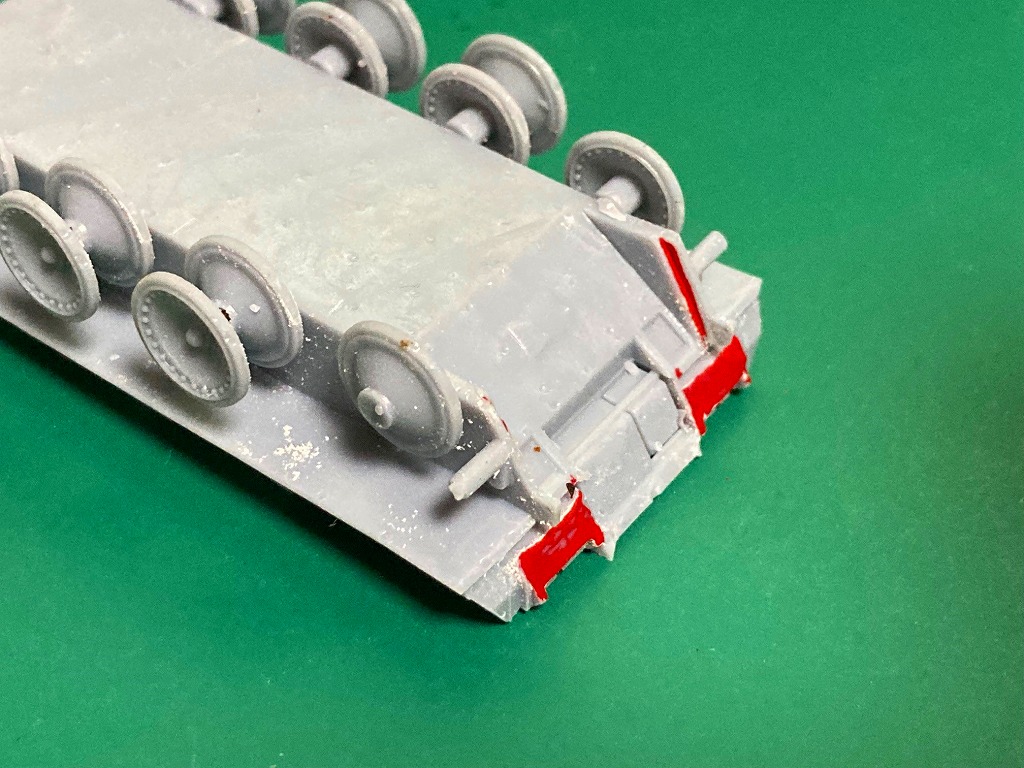
弊社の製品は可能な限り正しい寸法で印刷できるよう、最大限の注意を払っています。しかし、光造形式3Dプリンタの特性上、どうしても部品の下面はふくらみが残ります。
例えば「2:車体」では、以下の画像の赤い部分が膨らんでしまっています。
大変お手数をおかけいたしますが、この赤い個所は板ヤスリ等を使用し、正しい面を出して頂けますようよろしくお願いいたします。
同様のふくらみは、
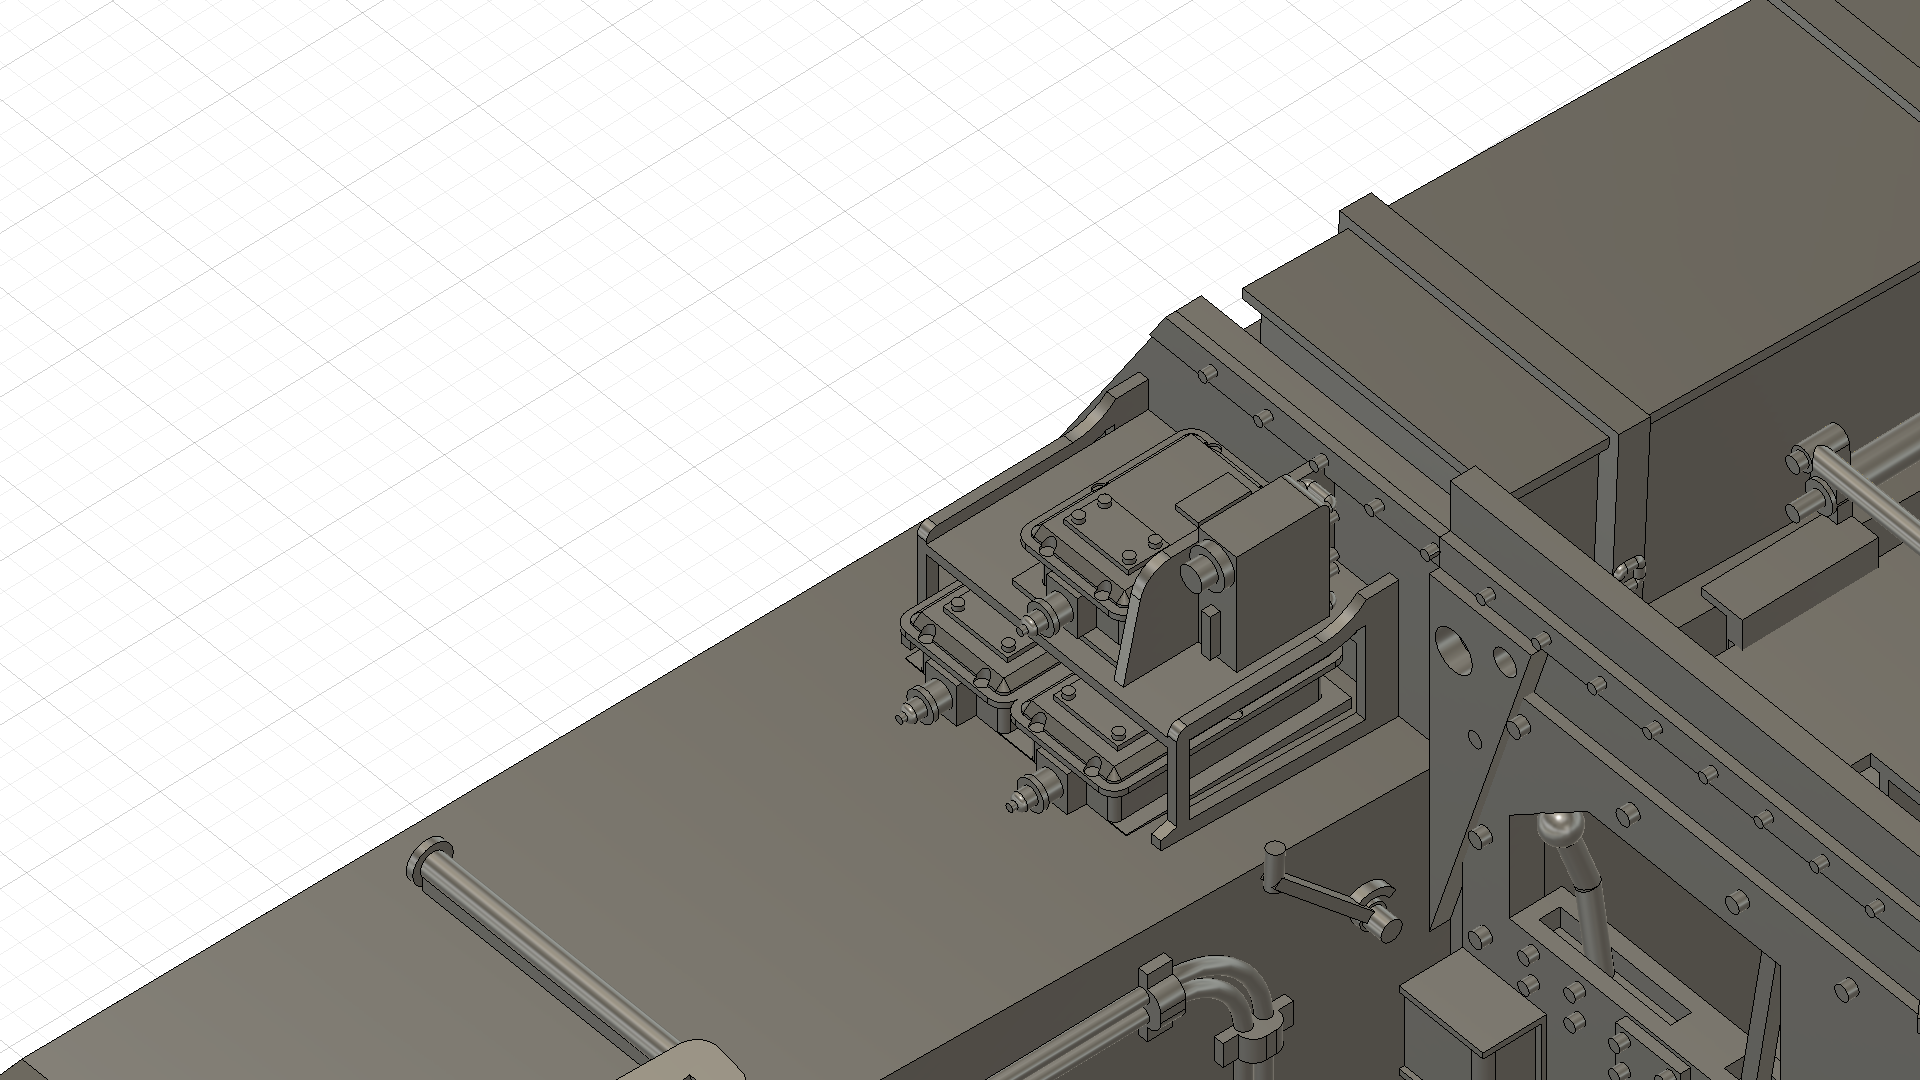
6:変圧器(小)
7:変圧器(大)
8:スイッチボックス
24:雑具箱
等で発生してしまっています。こちらも合わせて下面の面出しを実施してください。特に「7:変圧器(大)」はこの下面の面出しを行わないと、車体に取り付けることができません。
I take the utmost care to ensure that our products are printed in the correct dimensions possible. However, due to the characteristics of 3D printers, the underside of parts inevitably has a bulge.
For example, in "2: Body", the red part in the image below is bulging.
I apologize for the inconvenience, but please use a file for this red part to get the correct surface.
Similar bulges
6: Transformer (small)
7: Transformer (Large)
8: Switch box
24: Miscellaneous goods box
In particular, "7: Transformer (Large)" cannot be attached to the body unless to get the correct surface.
履帯の接着方法 How to glue the tracks to the body
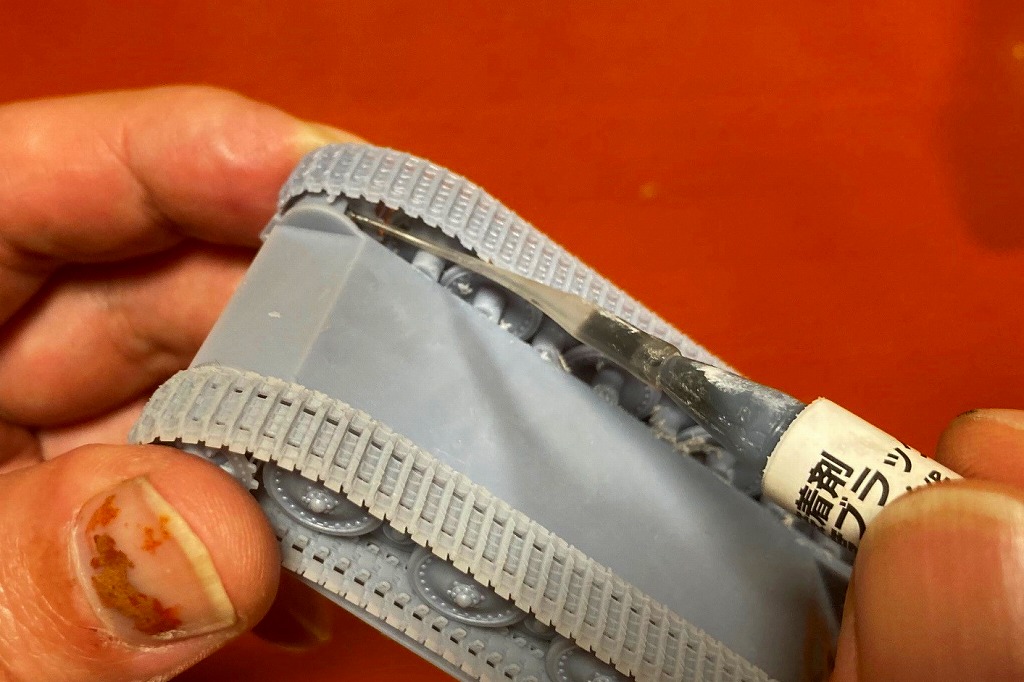
履帯を車体に接着する際は、起動輪の裏側を瞬間接着剤で接着するだけでよいです。その際、起動輪が傾かないようにしっかりと指で押さえて接着を行います。
When gluing the tracks to the car body, glue the back of the drive wheel with super glue. At that time, hold it firmly with your fingers so that the drive wheel does not tilt.
- 左右の履帯を車体に取り付け、起動輪の上部を指でしっかり押さえます。
- 車体を裏返し、起動輪と車体の隙間に瞬間接着剤(流動性の高いもの)を流し込みます。
- そのまま数分間維持し、接着を完了させます。
ウィンチワイヤの取り付け方法 How to attach the winch wire
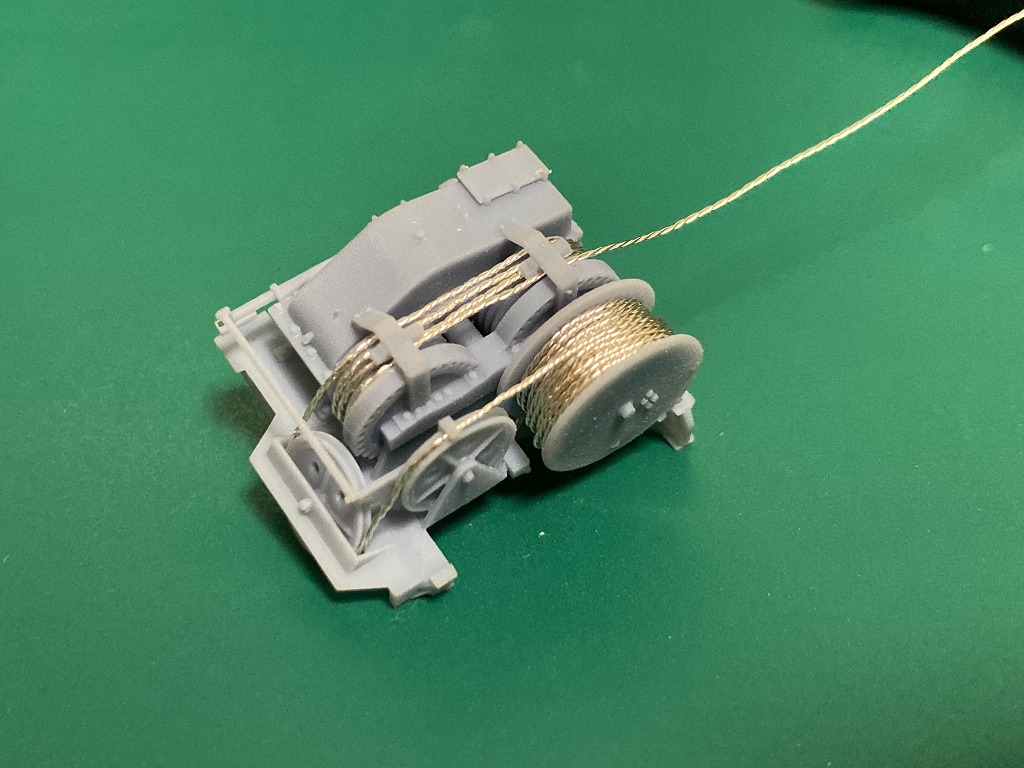
本キットにはウィンチのワイヤに使用できる、0.4mmの銅ワイヤが付属しています。このワイヤの取り付け方法を解説します。
ワイヤの取り付けに当たり、ウィンチを破損しないよう細心の注意を払ってください。念のためウィンチはスペアを同梱しています。
ワイヤは、75cm使用します。
This kit comes with a 0.4mm copper wire that can be used for winch wires. I will explain how to attach this wire.
When installing the wires, take great care not to damage the winch. Just in case, the winch comes with a spare.
The wire needs 75 cm.
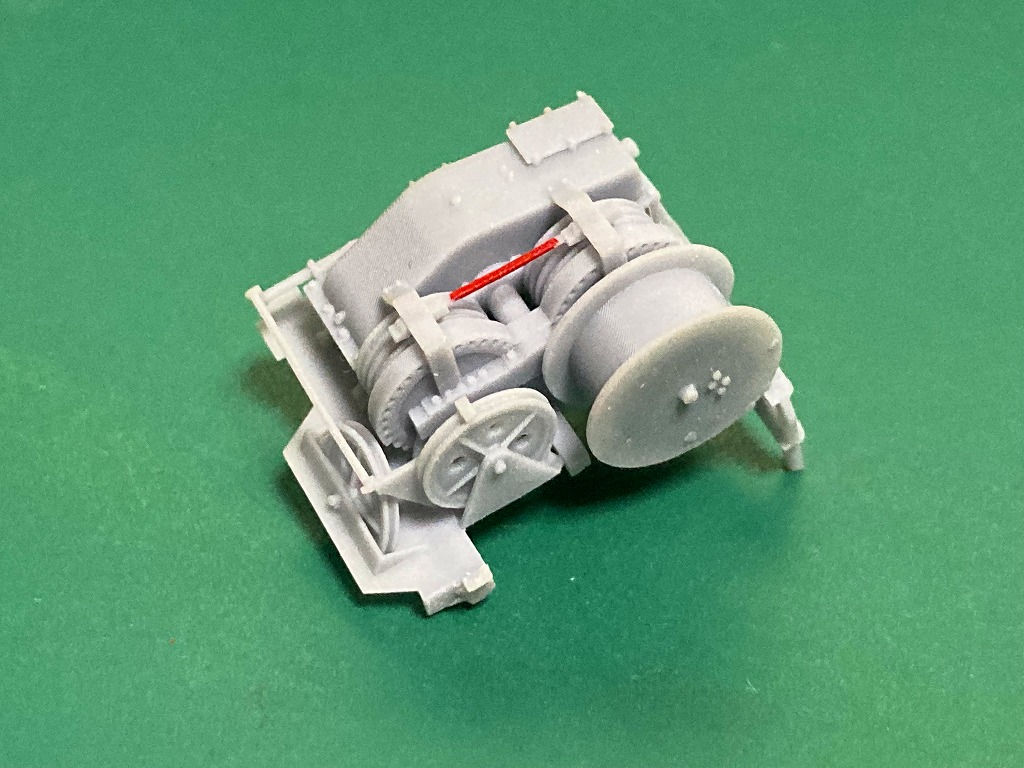
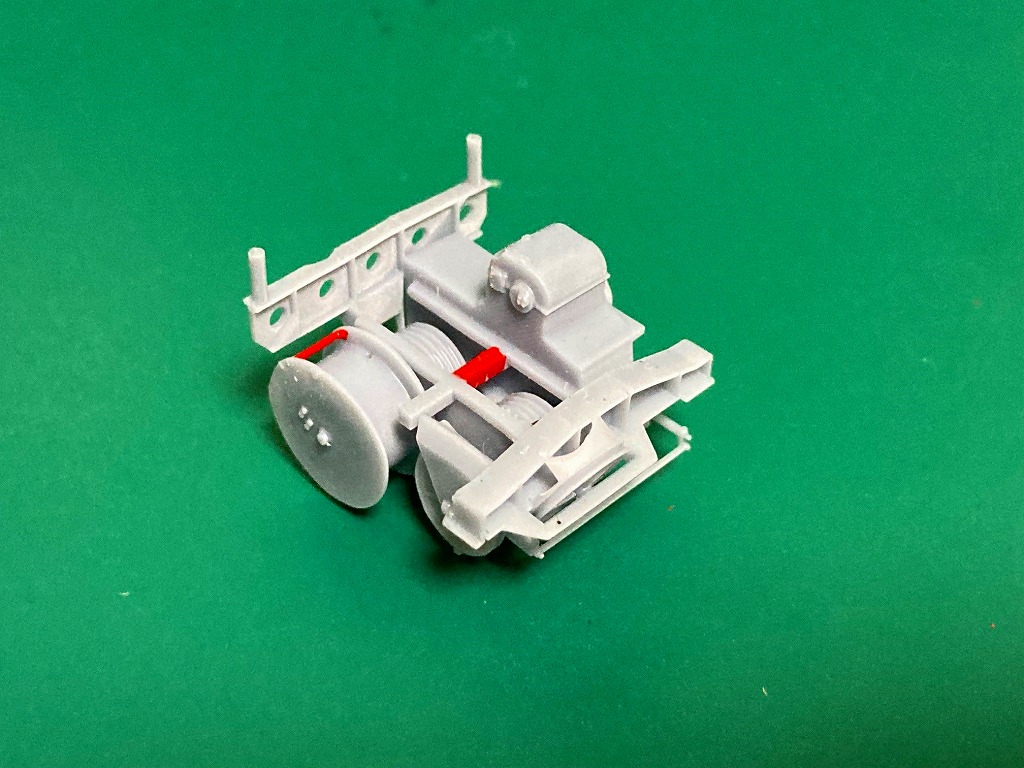
不要個所の削除 Delete unnecessary parts
以下の画像の赤い部分をニッパー等で切断し、取り除きます。
Cut the red part of the image below with a side cutter etc. and remove it.
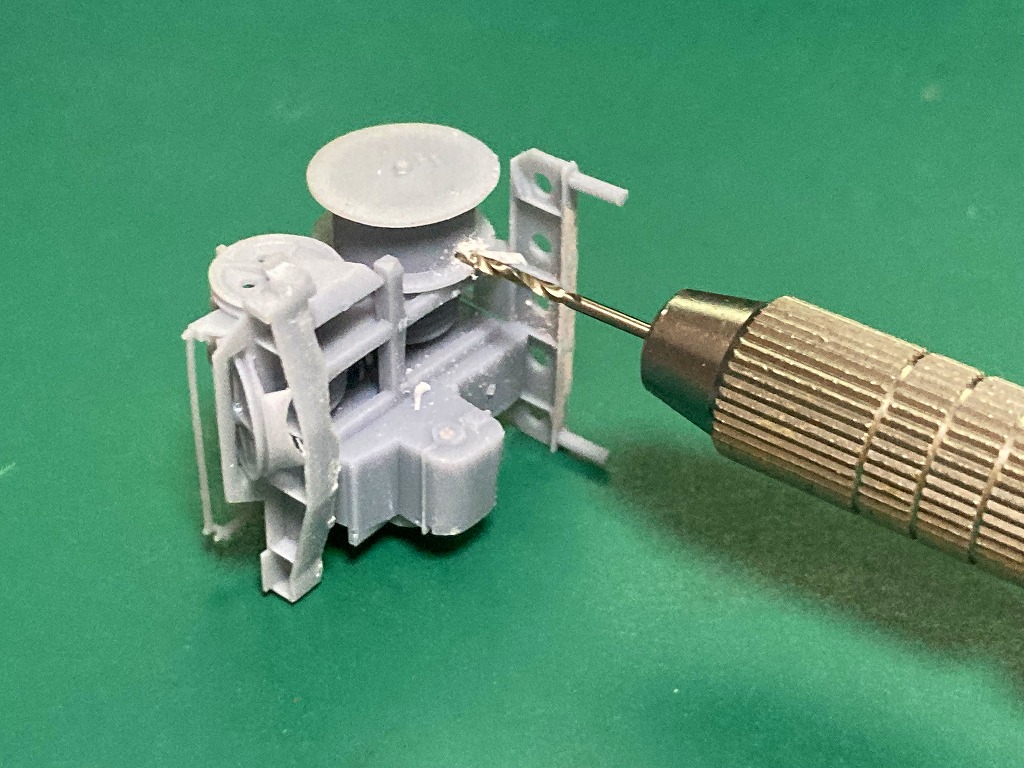
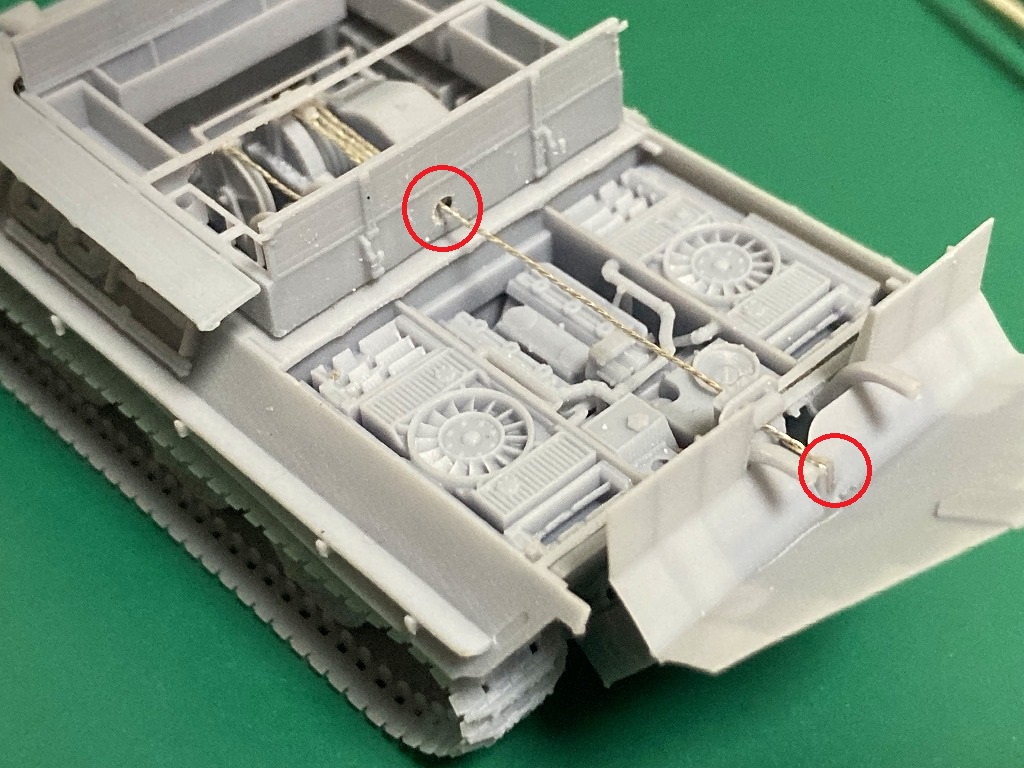
ワイヤ取り付け穴の穴あけ Drilling wire mounting holes
ワイヤを取り付けるため、0.6mm穴をピンバイスで開けます。開ける場所にはへこみがあります。
Drill a 0.6 mm hole with a pin vise to attach the wire. There is a dent in the place to open.
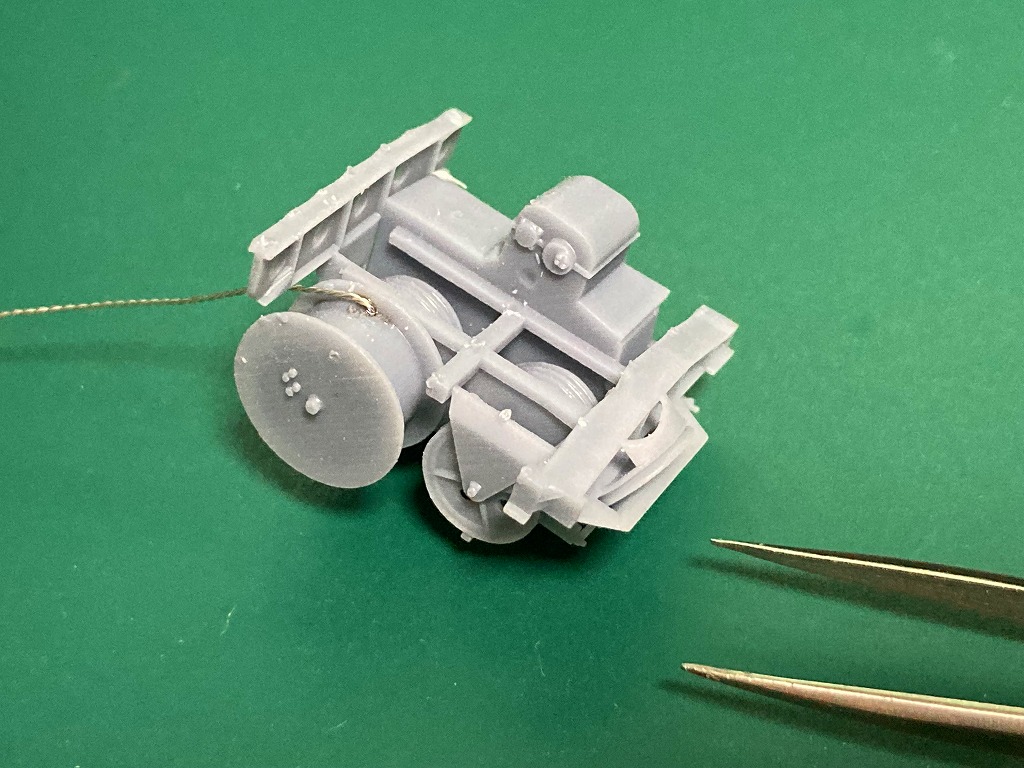
ワイヤの取り付け Wire installation
先ほどあけた穴にワイヤを差込み、瞬間接着剤で固定します。
Insert the wire into the hole you made earlier and fix it with super glue.
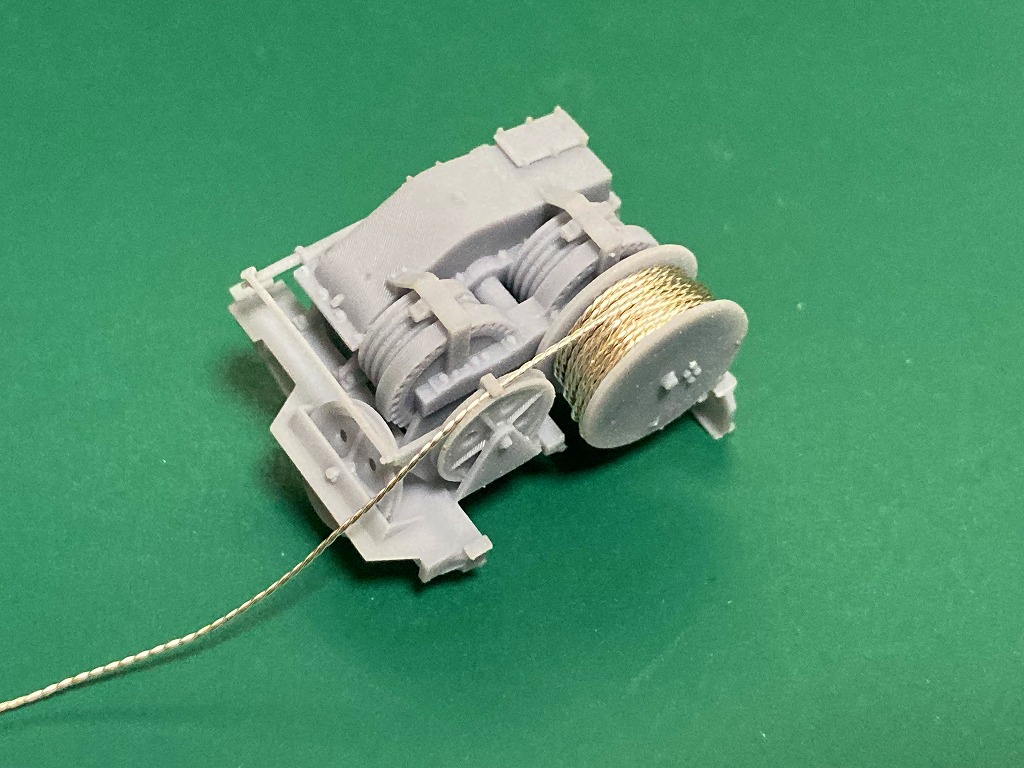
巻き取り機にワイヤを巻く Wind the wire around the winder
巻き取りきにワイヤを巻きます。最終的に、ワイヤが中央に位置するまでワイヤを巻いてください。
Wind the wire around the winder. Finally, wind the wire until it is centered.
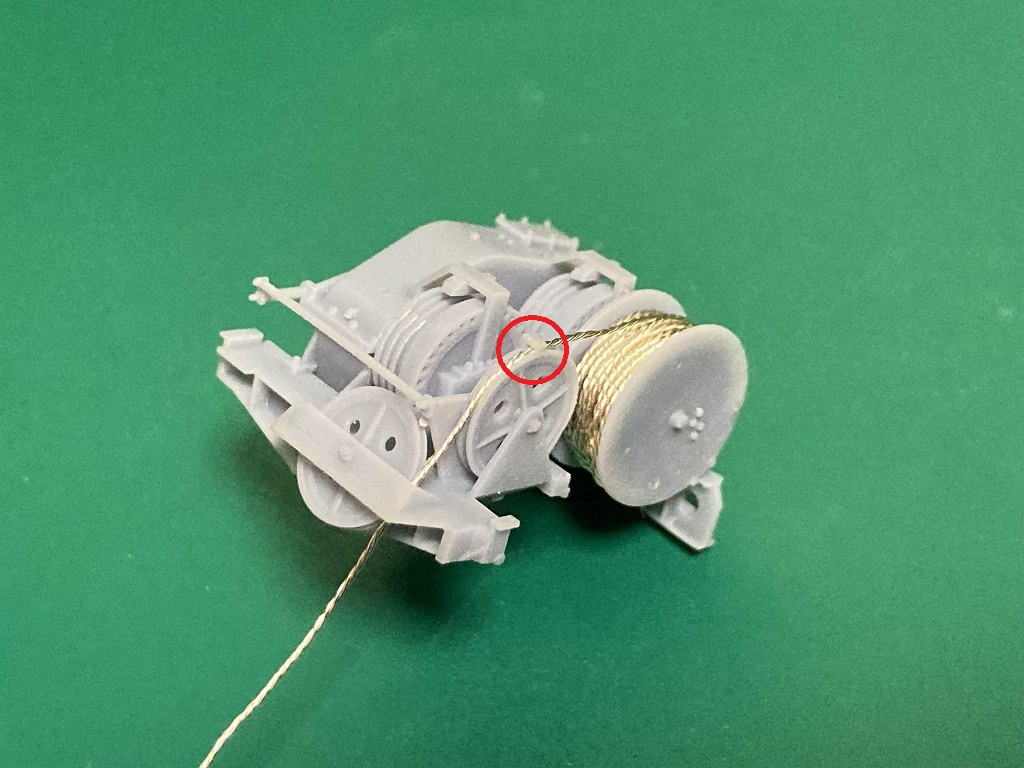
1つ目の滑車の上部ガイドにワイヤを通す Thread the wire through the top guide of the first pulley
1つ目の滑車の上部ガイドにワイヤを通します。
Thread the wire through the top guide of the first pulley.
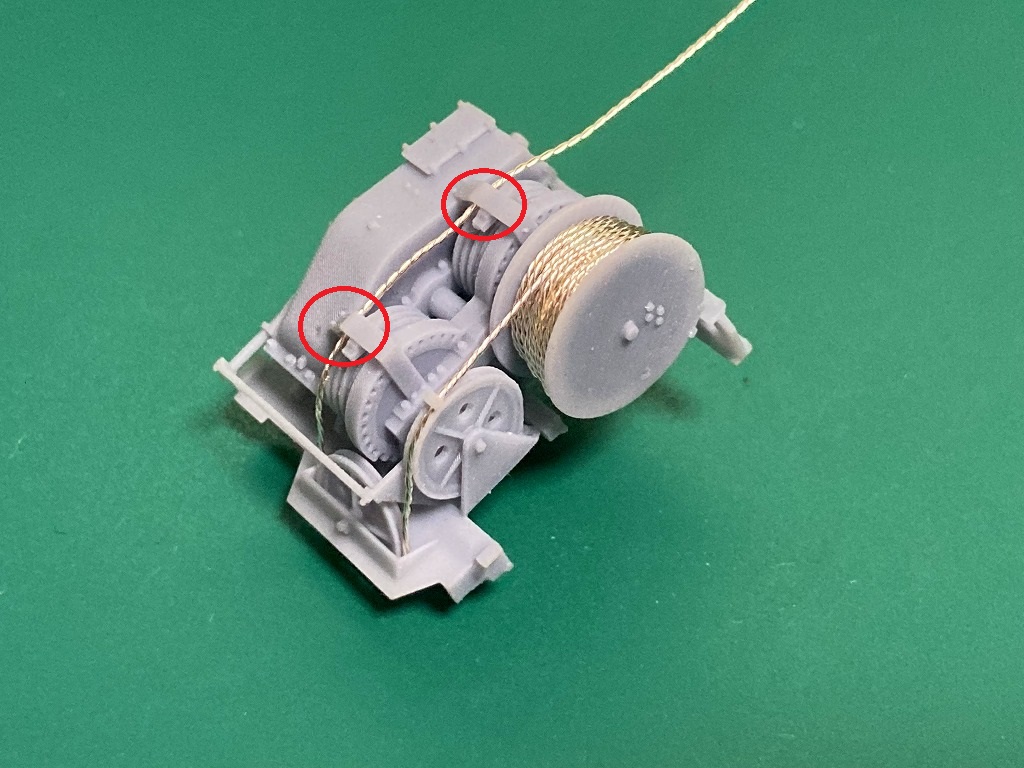
2つ目の滑車のガイドにワイヤを通す Thread the wire through the guide of the second pulley
2つ目の滑車のガイドにワイヤを通します。
Thread the wire through the guide of the second pulley.
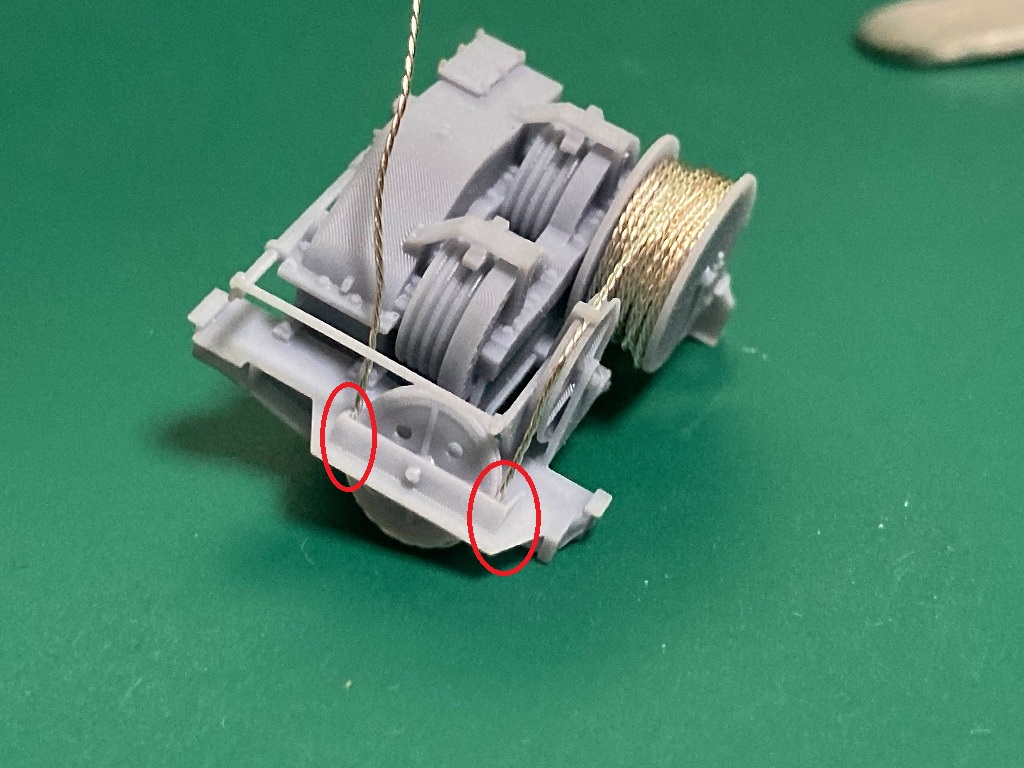
ワイヤを後方に通す Thread the wire backwards
巻き上げ機のガイドの下を通して、ワイヤを後方に通します。
Pass the wire backwards under the guide of the winder.
巻き上げ機にワイヤを巻き付ける Wind the wire around the winder
巻き上げ機にワイヤを4回、巻き付けます。
Wrap the wire around the winder four times.
ウィンチハウジングの穴を通過し、スペードにワイヤを取り付ける Pass through the hole in the winch housing and attach the wire to the spade
ウィンチを車体に組付け、ワイヤをウィンチハウジングの穴を通過し、スペードに取り付けます。
Assemble the winch to the car body, pass the wire through the hole in the winch housing, and attach it to the spade.
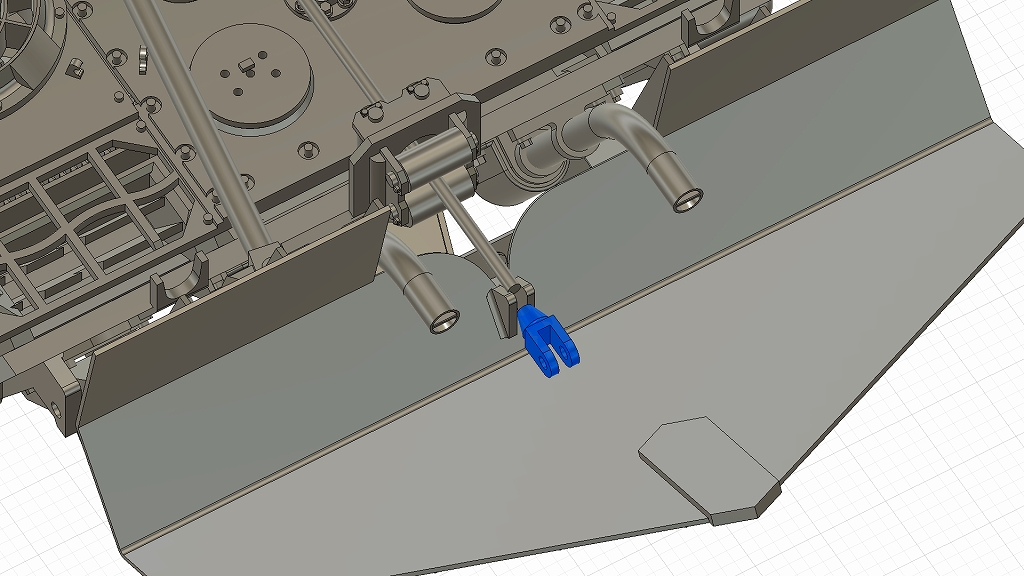
牽引ワイヤー先端を接着 Glue the "Tow wire tip"
「19:牽引ワイヤー先端」をスペードに接着して、作業は完了です。
Glue "19: Tow wire tip" to the spade and you're done.
最後に
以上で自作野郎工房の開発した3Dプリンタキット「1/72 ベルゲパンター フルインテリアキット[3Dプリンタ出力品]」について概要の説明を終わります。
弊社としては初めてのフルキットとなります。引き続き、1/72のドイツ戦車を中心にフルインテリアキットを開発してまいります。
ぜひ、市販のプラスチックモデルにはないディープな世界をお手に取ってご確認ください。

